There are many editors available for LaTeX writing, ranging from open-source and feature-rich to outdated and less appealing. The most commonly recommended setup is a local LaTeX installation paired with the VSCode LaTeX Workshop extension. While this setup is powerful, VSCode is a general-purpose editor typically used for other programming languages rather than as a dedicated LaTeX environment. As a result, even simple actions can feel less natural. For example, using the Cmd+B shortcut requires an additional Cmd+L prefix, and the LaTeX window can get lost among other open windows. To get the best of both worlds, I choose VSCodium as my primary dedicated LaTeX editor, with many settings customized, and it looks modern.
A common challenge with LaTeX is not the typesetting itself, but the writing experience. The interface can feel cluttered, especially in the early stages, which makes it harder to focus on drafting ideas.
So the question is: how do we make LaTeX feel usable and even enjoyable from the very first draft?
After switching to Mac and spending time on the macapps subreddit, I have started to appreciate well-designed apps much more. One writing app that gets recommended a lot is iA Writer. Its philosophy is simple: distraction-free writing by stripping away interface clutter and separating writing from formatting. With LaTeX, we can’t fully separate formatting, but at least we can reduce the noise and make the experience much cleaner with the editor we use. Another app I like is Texifier, a polished paid LaTeX editor for macOS. It feels modern, and the visual design is clean and easy on the eyes. However, it has some caveats and issues, lack Windows support, and the PDF viewer resolution is not the sharpest. Inspired by tools like these, I have customized the setup of some popular free editors such as TeXstudio, VSCodium, and TeXShop on macOS. You can apply similar ideas to Overleaf as well, either through custom CSS or by using it alongside VSCodium.
A few things that have made a noticeable difference for me:
Create your own custom class file and load packages there. It immediately makes your main document look much cleaner.
Most editors come with a lot of toolbars, but you don’t need them once you are comfortable with LaTeX. Turning off the extras helps reduce visual clutter.
You can write LaTeX in a basic text editor and compile separately, but modern editors add syntax highlighting and customization. That said, too many colors can be distracting. Choosing a simple color scheme, along with a good font, font size, and line spacing, can make a huge difference in how the editor feels.
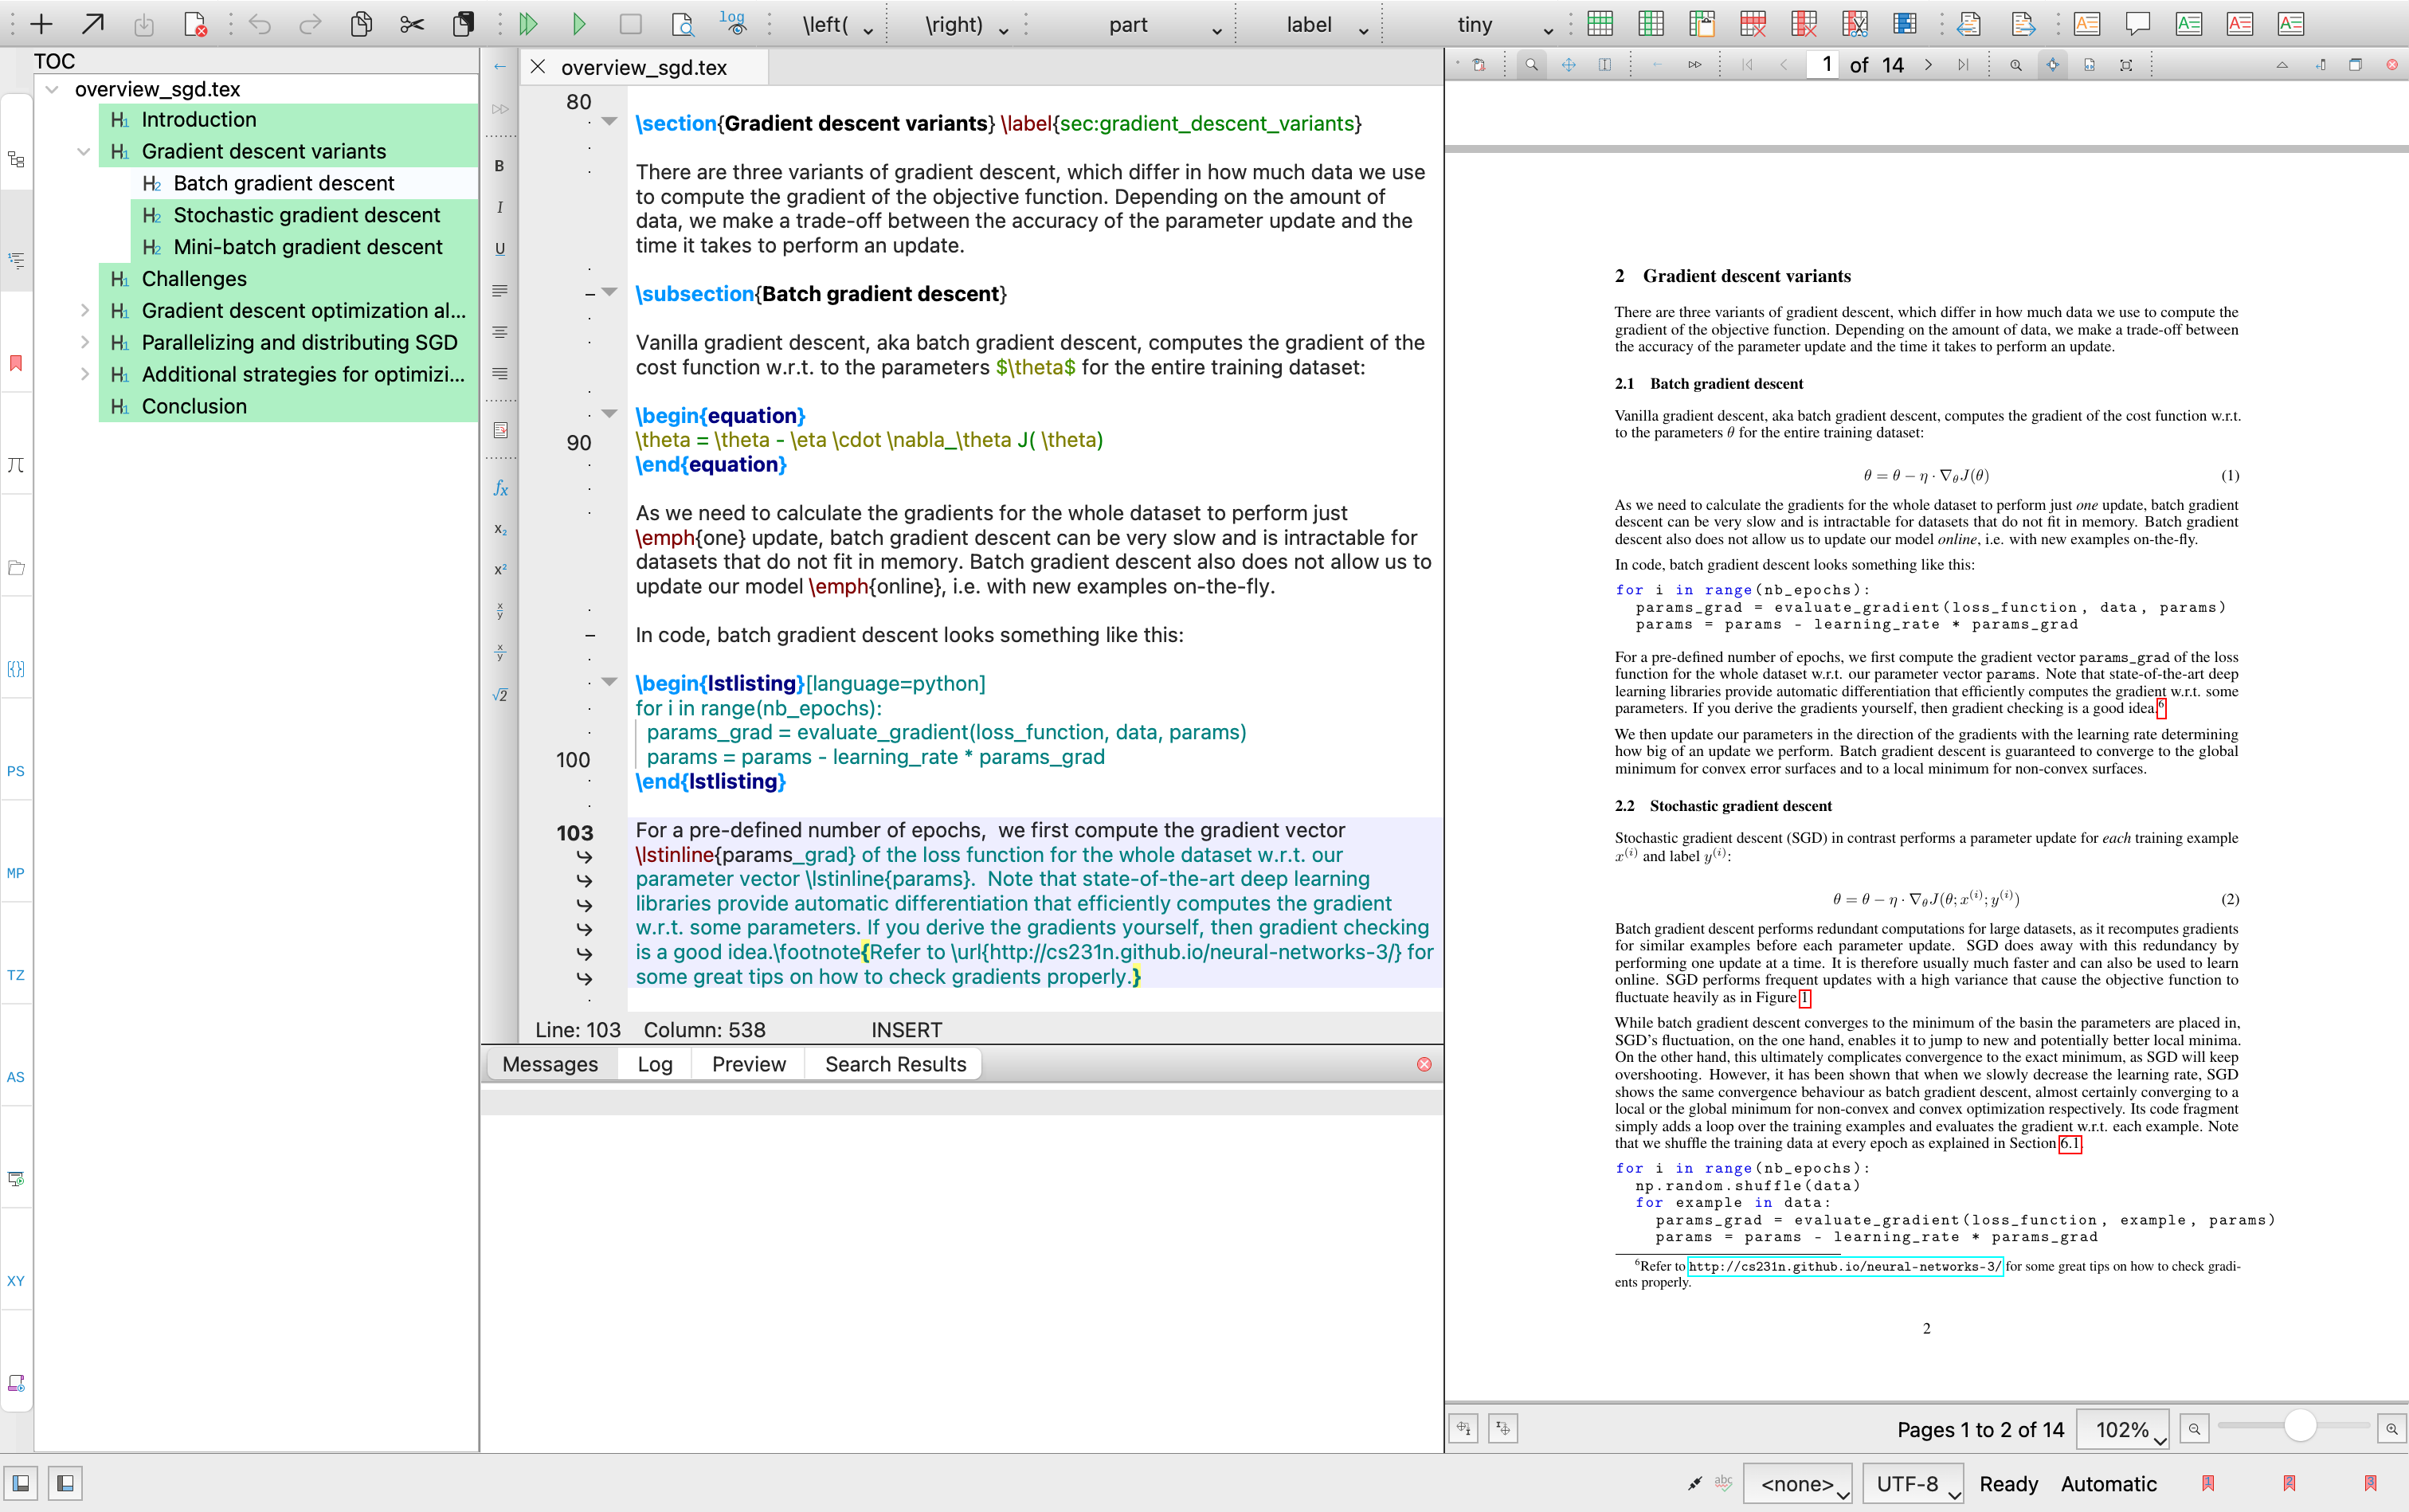
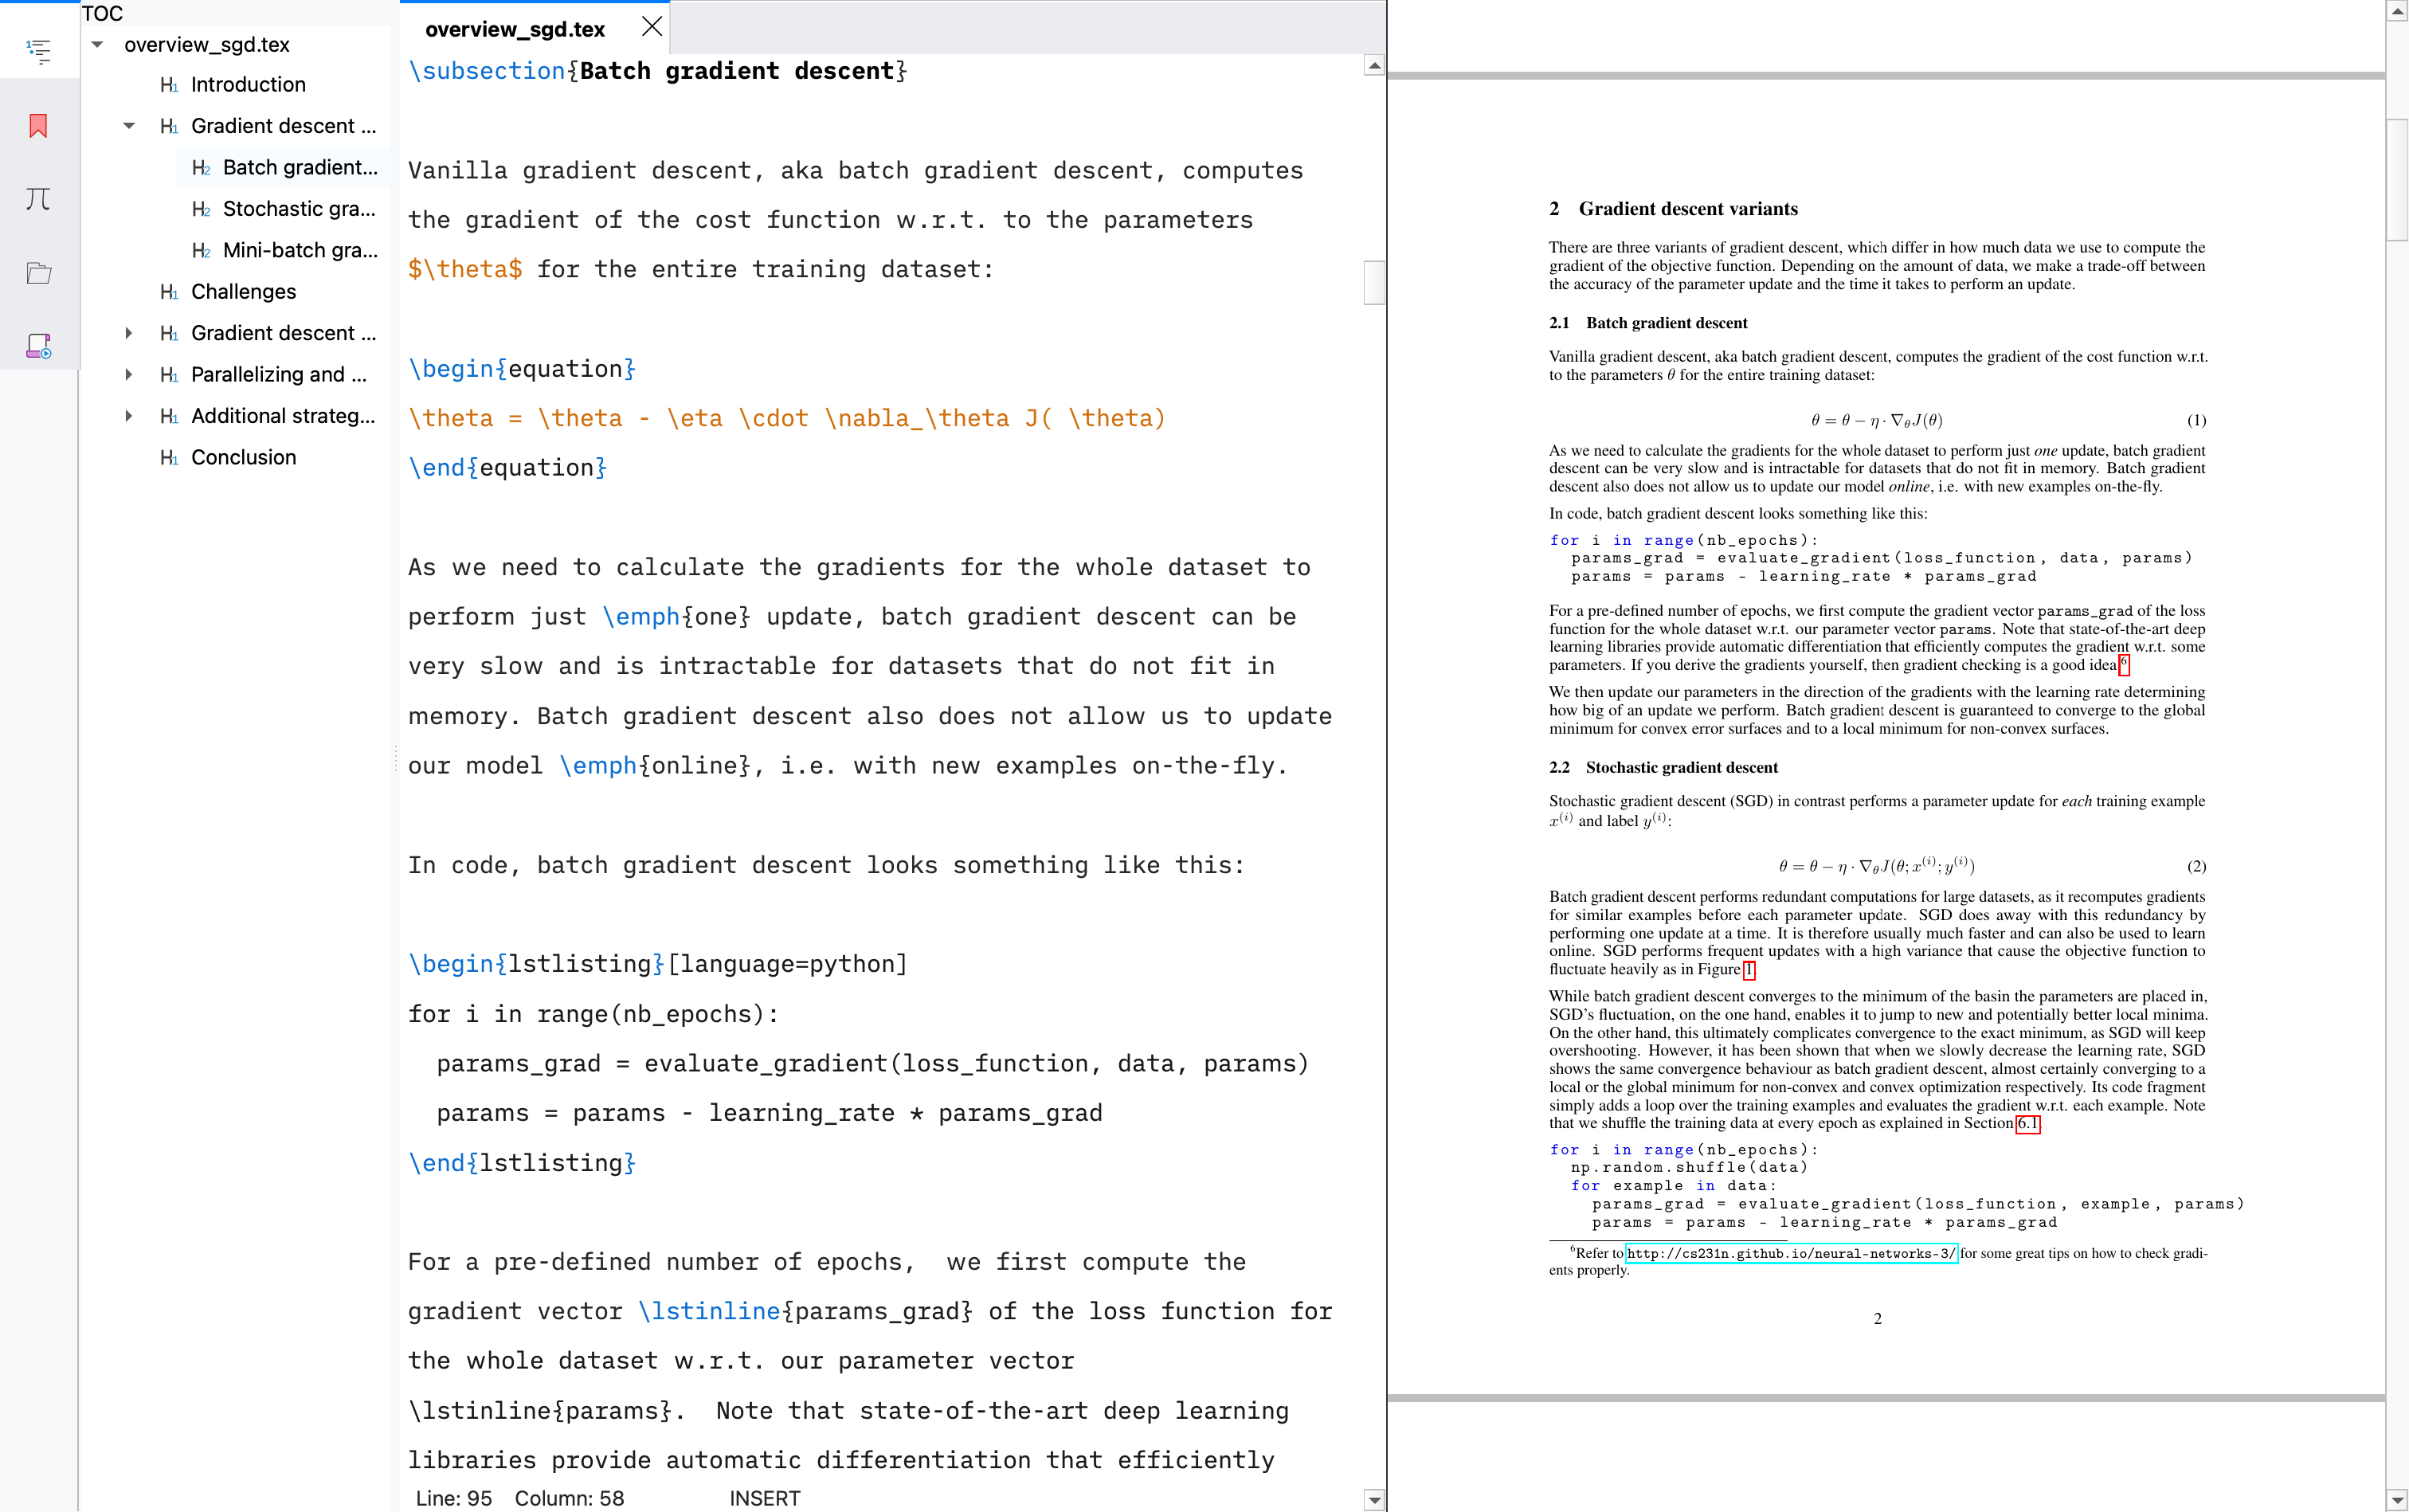
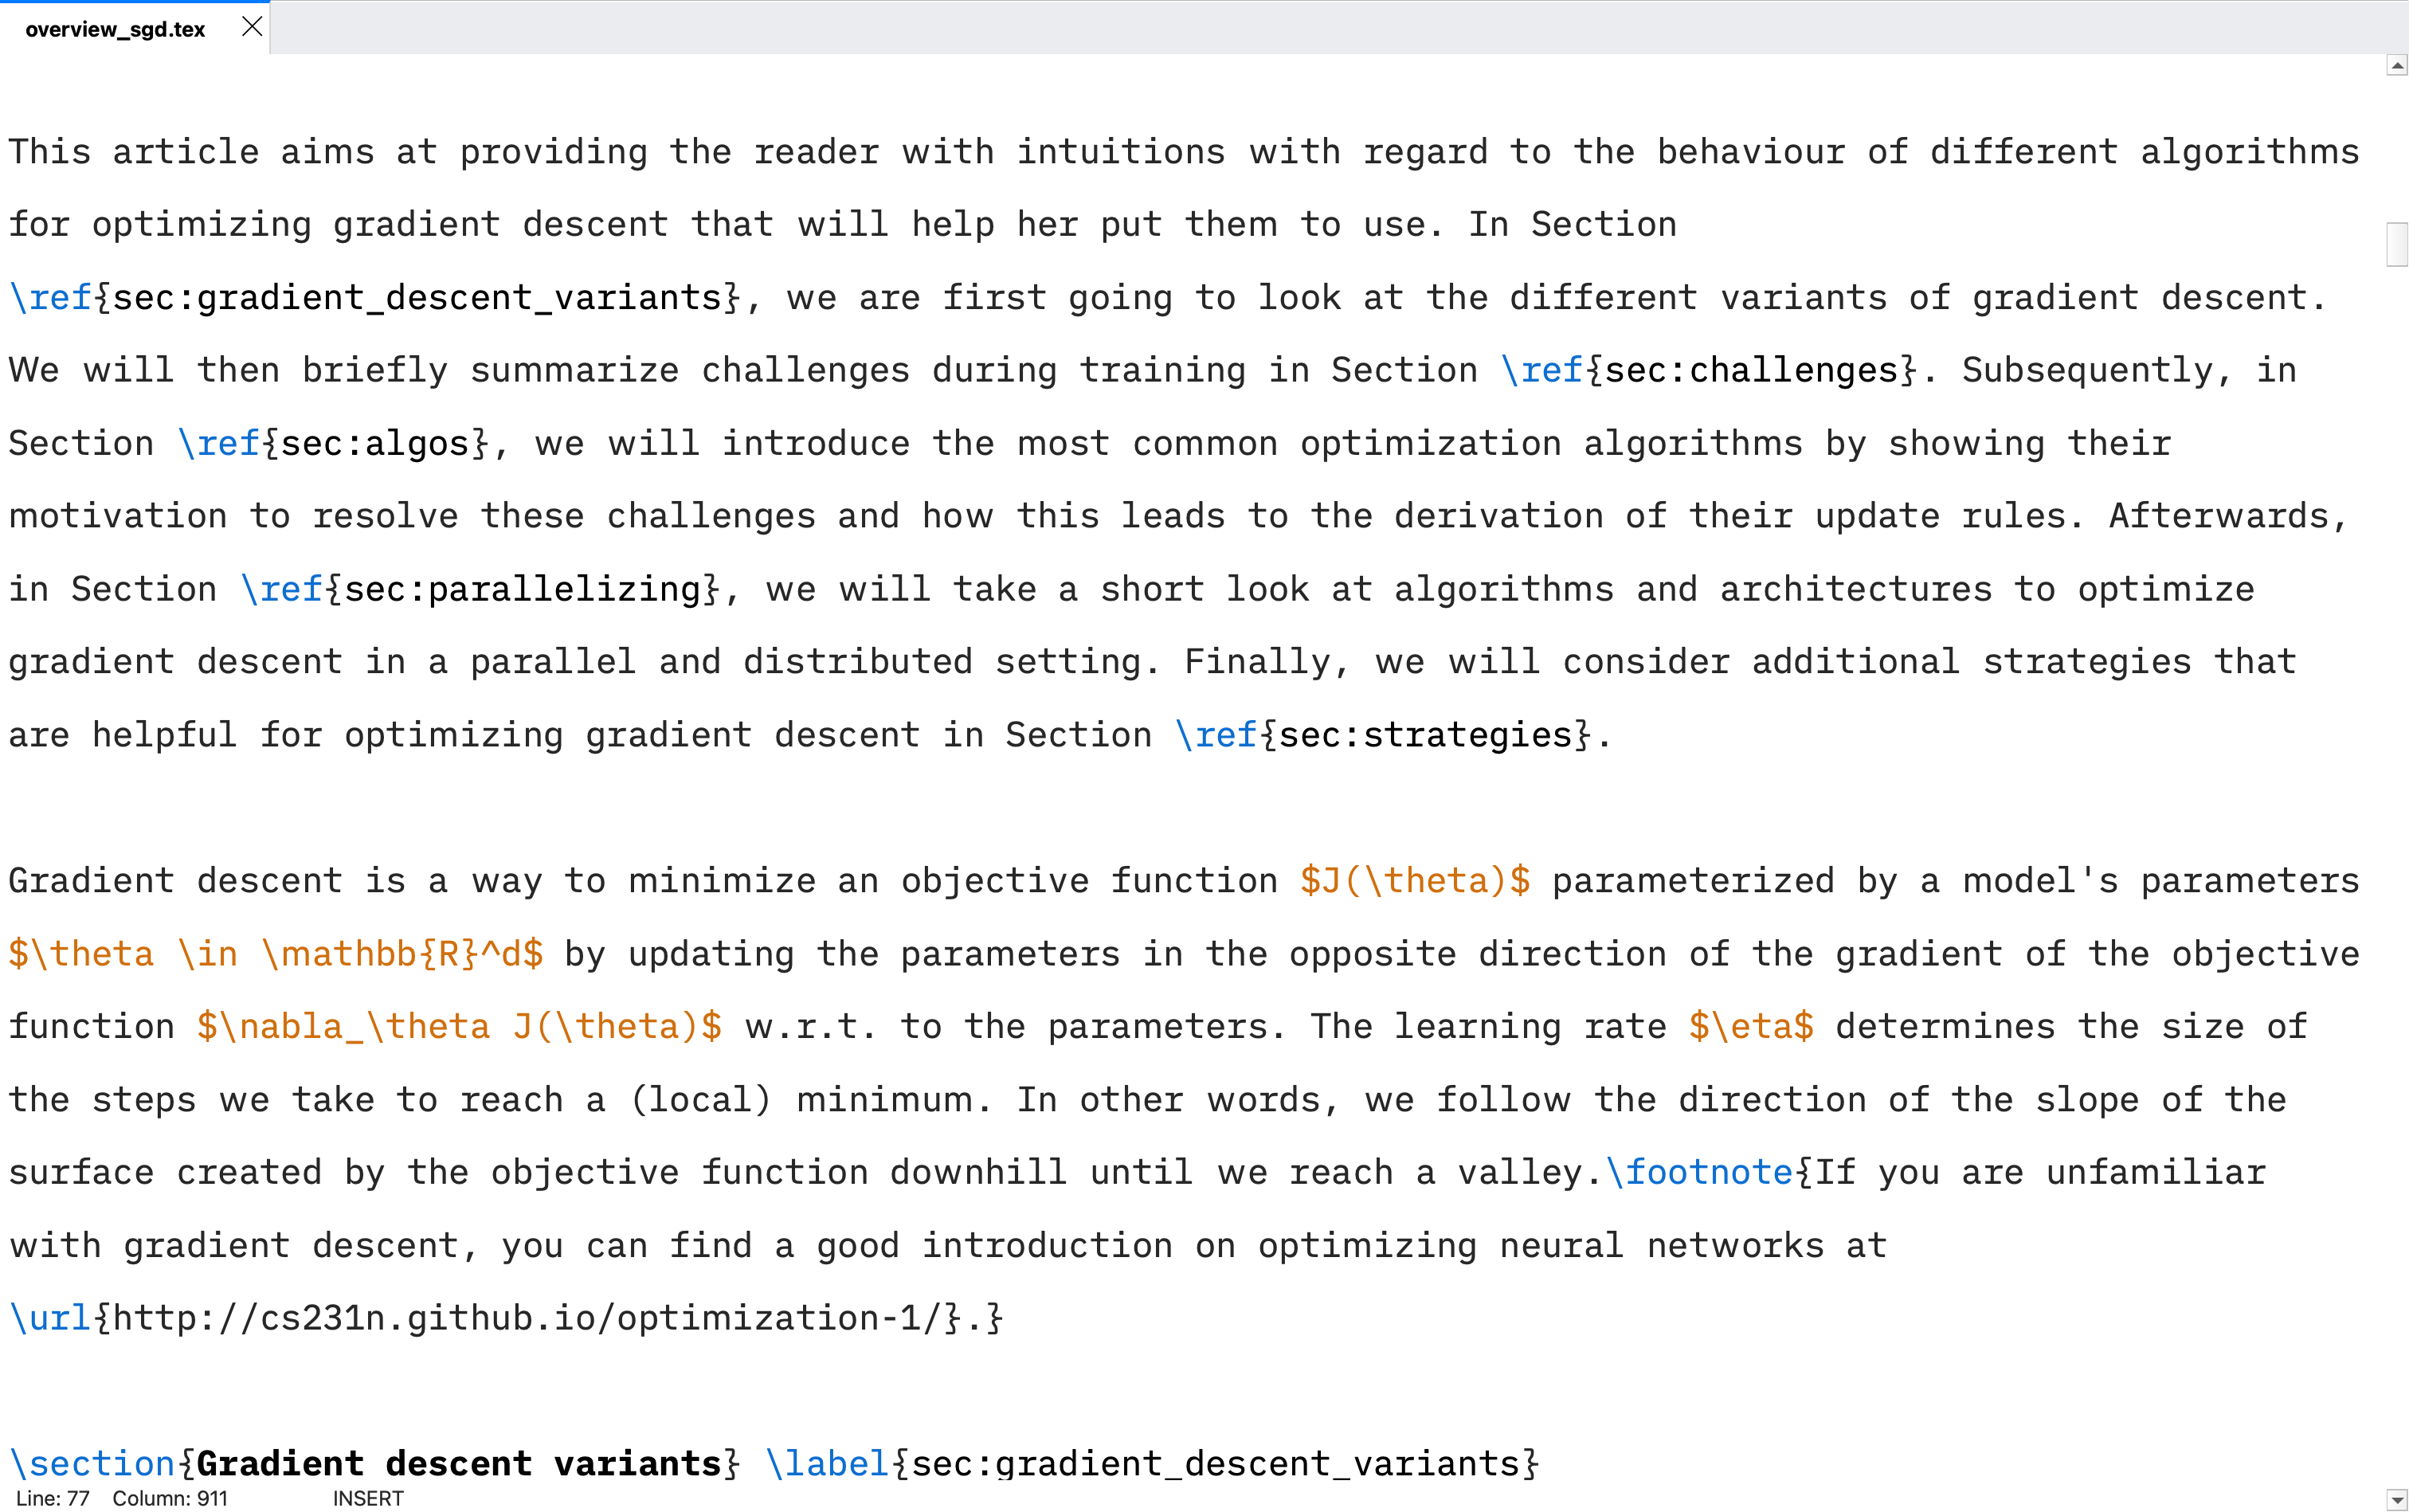
This post is not about setting up LaTeX from scratch. There are already many good guides for that. Instead, the focus here is on reducing clutter, improving readability, and making LaTeX more enjoyable to use from the very beginning. The comparison between the default setup and the modified setups is shown below. The font used in the modified setups is the iA Writer typeface family, and it can be downloaded from this link.
1 TeXstudio
The complete editor settings, including syntax highlighting colors, are provided in the texstudio.ini file (Mac / Windows). I also modified the editor toolbar appearance using a Qt stylesheet, with some AI assistance. These changes are contained in the stylesheet.qss file. On macOS, both files belong in ~/.config/texstudio/. On Windows, they belong in %APPDATA%\texstudio. Before copying the contents of the provided .ini file into texstudio.ini, please make a backup of the existing texstudio.ini file. Usually, stylesheet.qss does not exist, so you can copy it directly. These files are based on TeXstudio v4.9.3.
Key changes:
General: Style set to Fusion (macOS) and Default (Windows), Color Scheme to Classic, Icon Theme to Colibre. Enable use system theme colors. The modified Qt stylesheet is based on these styles. If you use styles different from the recommended ones, the UI will not appear the same as shown in the images below.
Commands and Build: Auxiliary files are redirected to an
outsubdirectory to keep the project folder clean. The default compilation recipe I use ispdflatex → bibtex → pdflatex x 2. You can also switch it toLatexmkif you prefer.Shortcuts: Changed toggle comment to Cmd+/ (Mac) and Ctrl+/ (Win).
GUI Scaling: The default scaling of tool bars is quite small; adjust this based on your display size.
Editor: iA Writer Duo V, size 20 and line spacing 160% (change based on your liking and screen size). Line numbers are currently disabled because word-wrapped lines are also numbered, and there is no option to suppress that.
Adv. Editor: “Use color in global TOC” set to No Color Background for a cleaner sidebar.
Syntax highlighting: Updated colors across basic highlighting and LaTeX-specific checks. You can see the specific colors after replacing your
texstudio.inifile with the provided one.Internal PDF viewer: Screen resolution bumped to 600 dpi for a sharper render.
The Qt stylesheet changes the application background, toolbar colors, sidebar, editor tabs, the divider between panels, the status bar, and the line number gutter. A few things could not be changed: the solid black line between the editor and PDF viewer appears to be hard-coded, and the full file path in the top toolbar cannot be hidden except in full-screen mode on macOS. You can also enable auto-hide on the PDF viewer’s internal toolbar for an even cleaner look.
2 VSCodium
The extensions needed for this setup are:
LaTeX Workshop for compilation, PDF viewing, and SyncTeX
LTeX+ for grammar and spell checking
Material Icon Theme (optional, for file icons)
You can also refer to this link for more detailed explanations on the LaTeX Workshop setup.
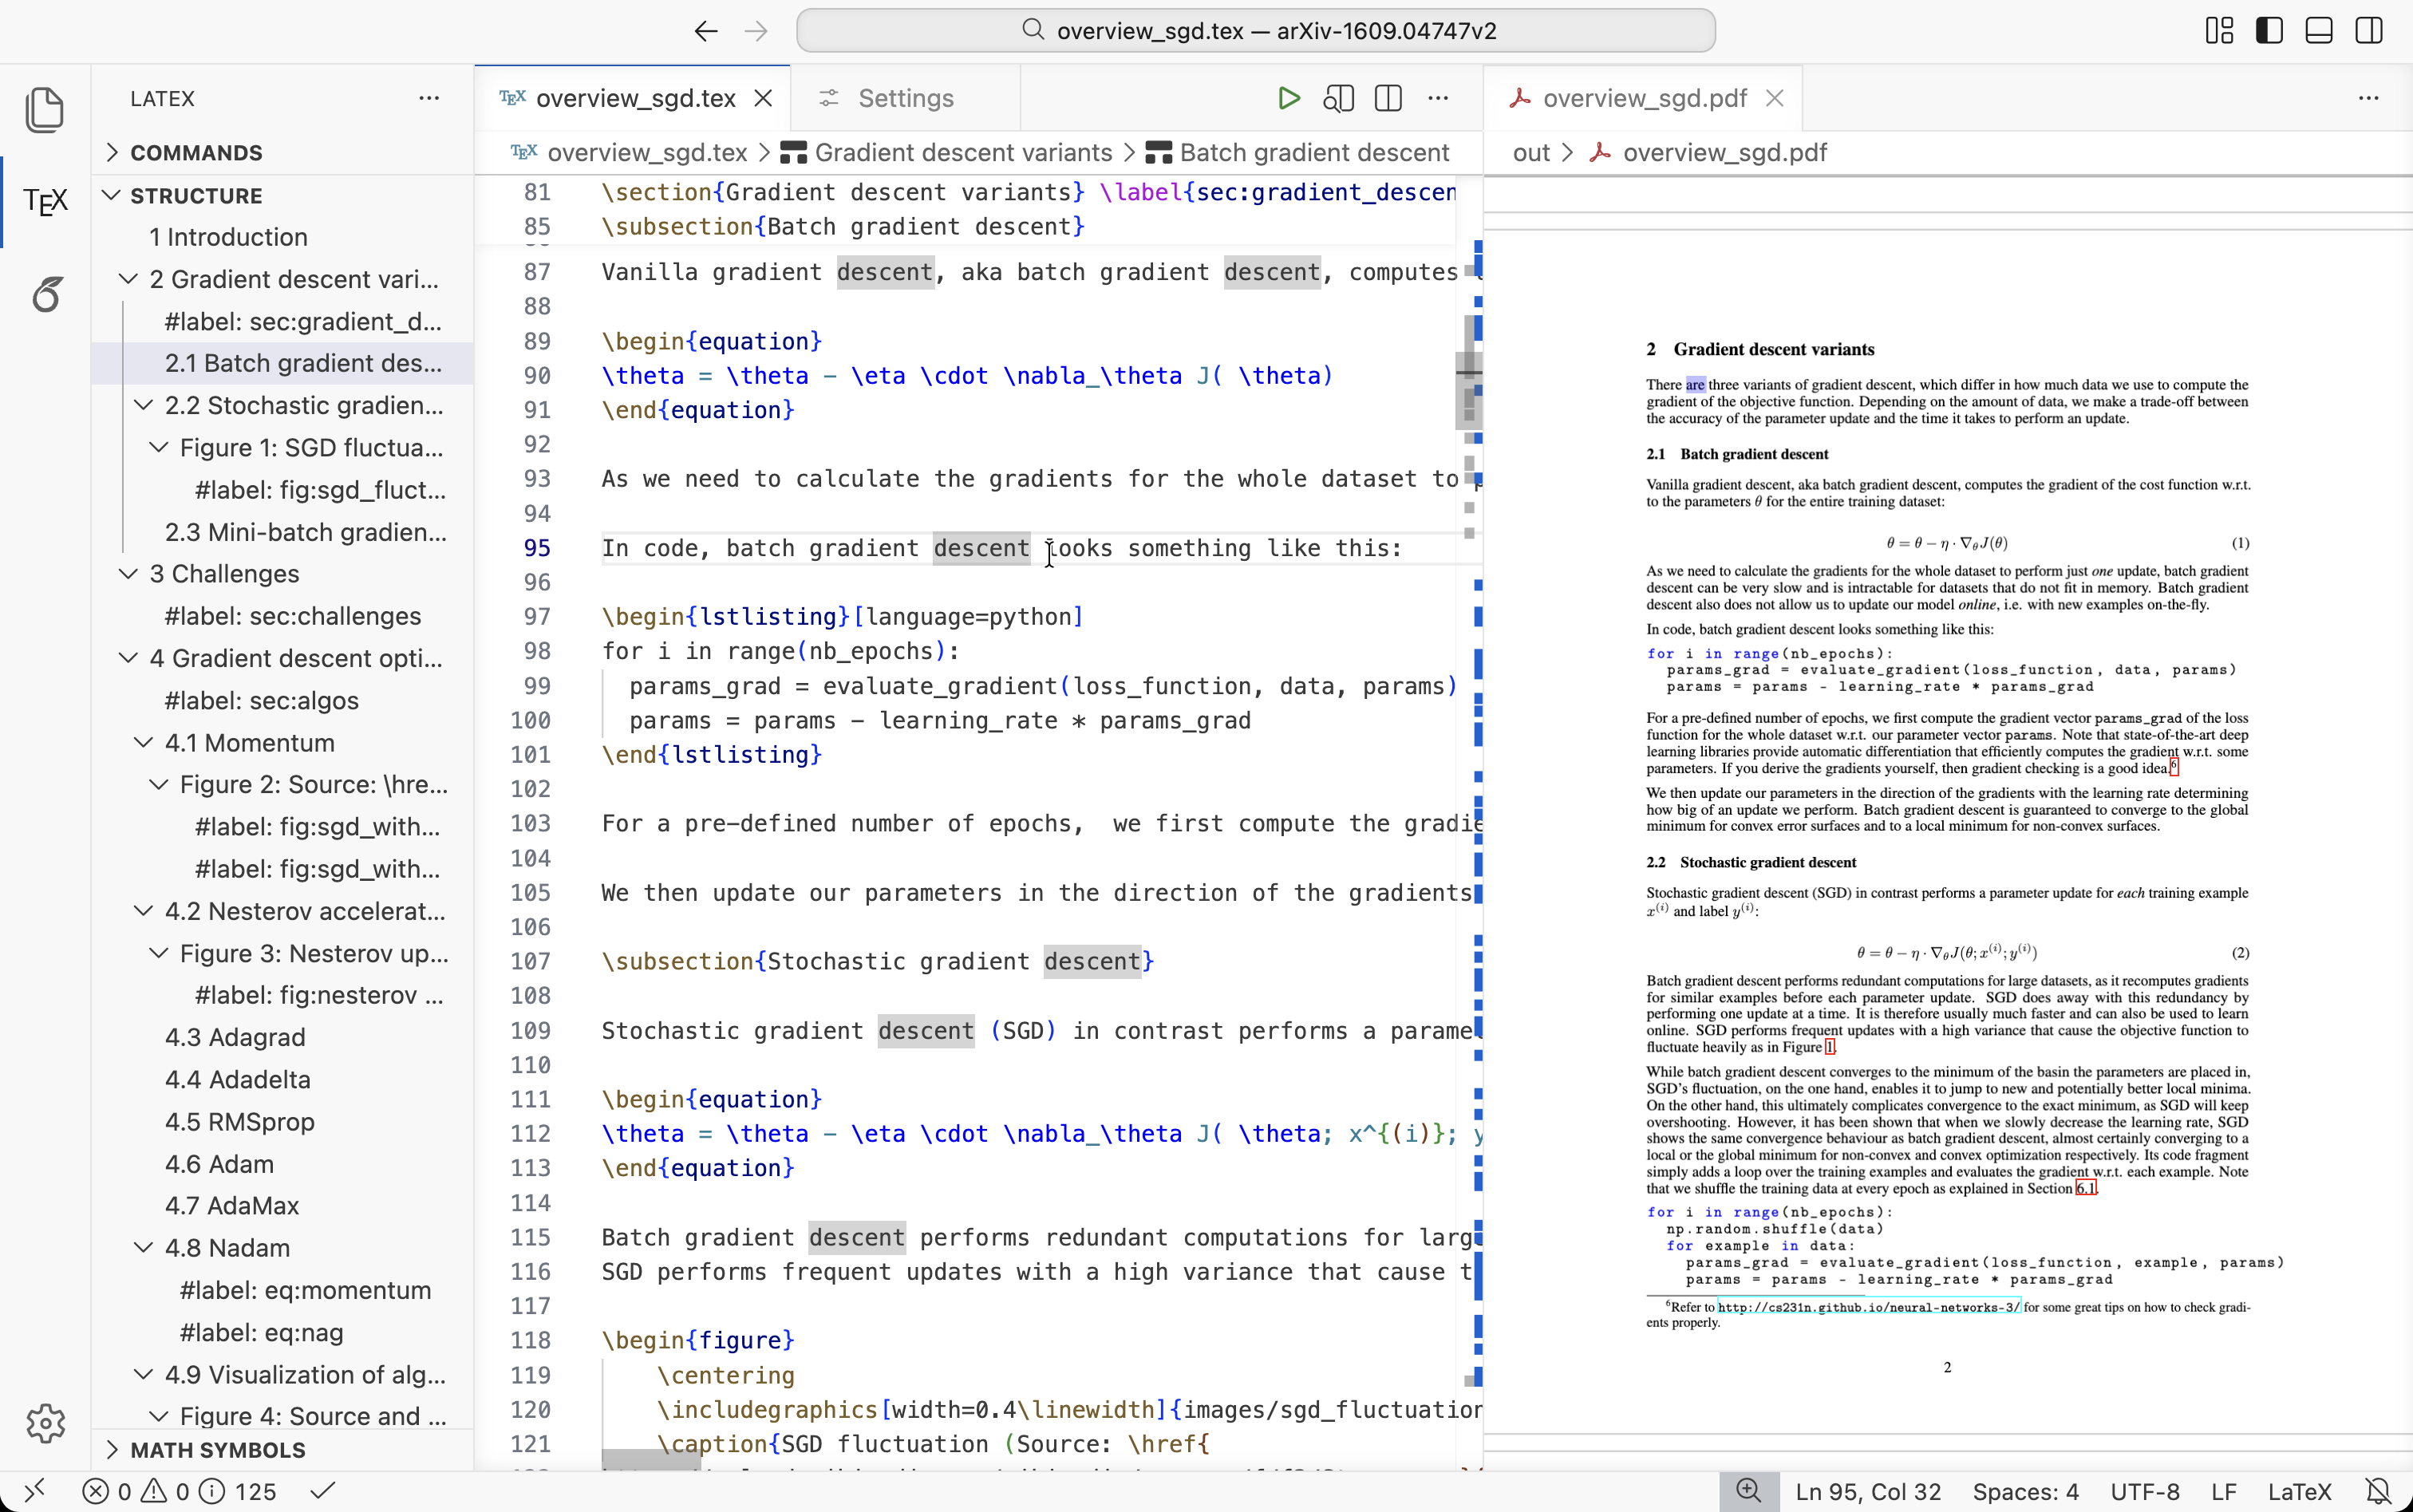
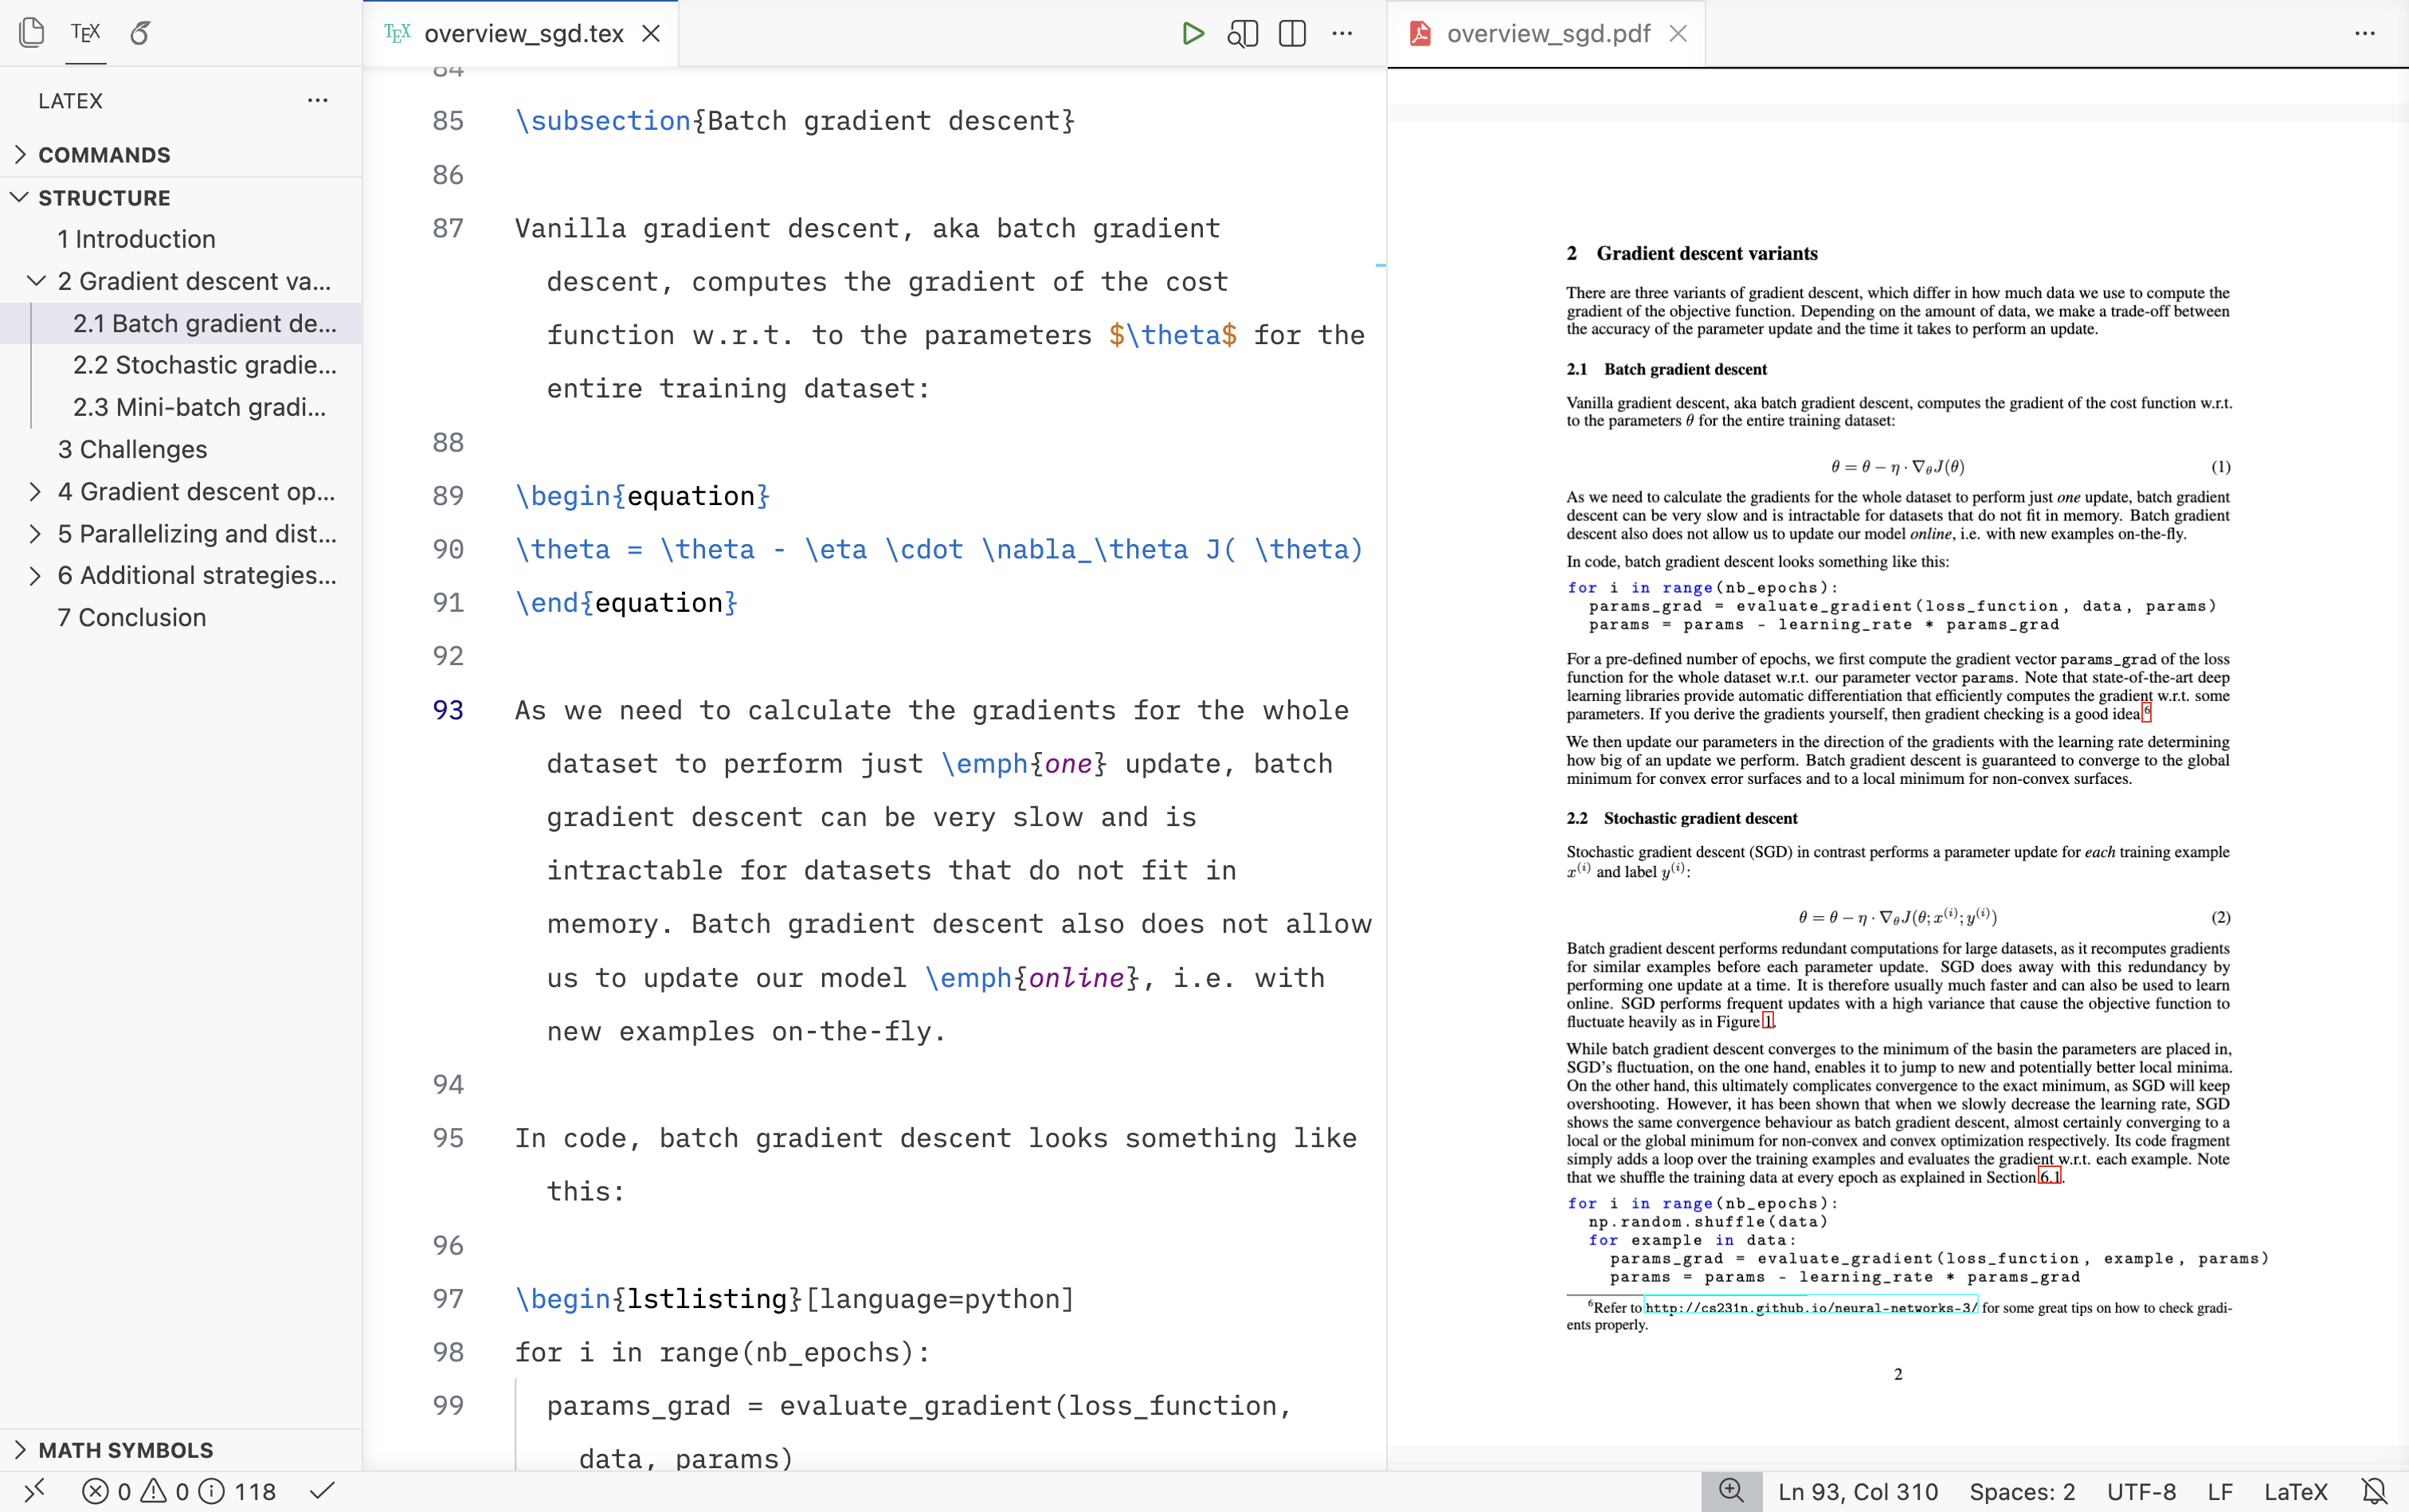
Rather than pasting the full settings.json here (Light Mode.json / Dark Mode.json), here are the most meaningful changes grouped by category. You can copy the contents of the settings.json file and paste them into VSCodium by clicking View > Command Palette > typing “Preferences: Open User Settings (JSON)” > and pressing Enter.
Theme and font: The editor is set to Default Light Modern for both light and dark mode detection, which gives a clean, consistent look regardless of system appearance. The font is iA Writer Duo V at size 16 with a line height of 28.
Reducing visual clutter: The minimap, breadcrumbs, inline suggestions, line highlight, whitespace markers, rulers, and diff decorations in the gutter are all disabled. The scrollbar is set to auto-hide vertically and hidden horizontally. Bracket pair colorization is turned off. These changes strip away the visual noise that makes a general-purpose editor feel wrong for focused writing.
Editor behavior: Auto-save on focus change, format on save using latexindent (need to install this), word wrap with indented continuation lines, and tab size of 2. Sticky scroll and selection highlighting are disabled.
LaTeX Workshop:
PDF viewer opens in a tab alongside the editor
SyncTeX is triggered on double-click
Outline syncs with the PDF viewer
Auto-build runs on save
Output files are sent to an
outsubdirectoryError, warning, and information popups are suppressed to avoid interruptions (enable them if needed)
The PDF background and border color are set to a neutral gray so page boundaries blend into the background
Hover previews for math are disabled for a less jumpy experience (enable them if needed)
LTeX+ (grammar checking): Several overly aggressive rules are disabled, including AGREEMENT_SENT_START, EN_A_VS_AN, UPPERCASE_SENTENCE_START, and a handful of others that frequently trigger false positives in academic writing. Common LaTeX commands like \cite{}, \cref{}, \todo{}, and all macro definition commands are marked as ignore or dummy so the grammar checker does not flag them.
Syntax colors: Comments are green, keywords and functions are blue, types and numbers are orange, and strings are purple. Math environments, escape sequences, and text formatting commands like \textbf are highlighted in the same blue as keywords for visual consistency.
Keyboard shortcuts: To get the experience of native LaTeX editors, some of the basic keyboard shortcuts (bold, italics, underline, typewriter) have been modified. You can copy the contents of the keybindings.json file (Mac / Windows) and paste them into VSCodium by clicking View > Command Palette > typing “Preferences: Open Keyboard Shortcuts (JSON)” > and pressing Enter. You can similarly add and modify your favorite shortcuts.
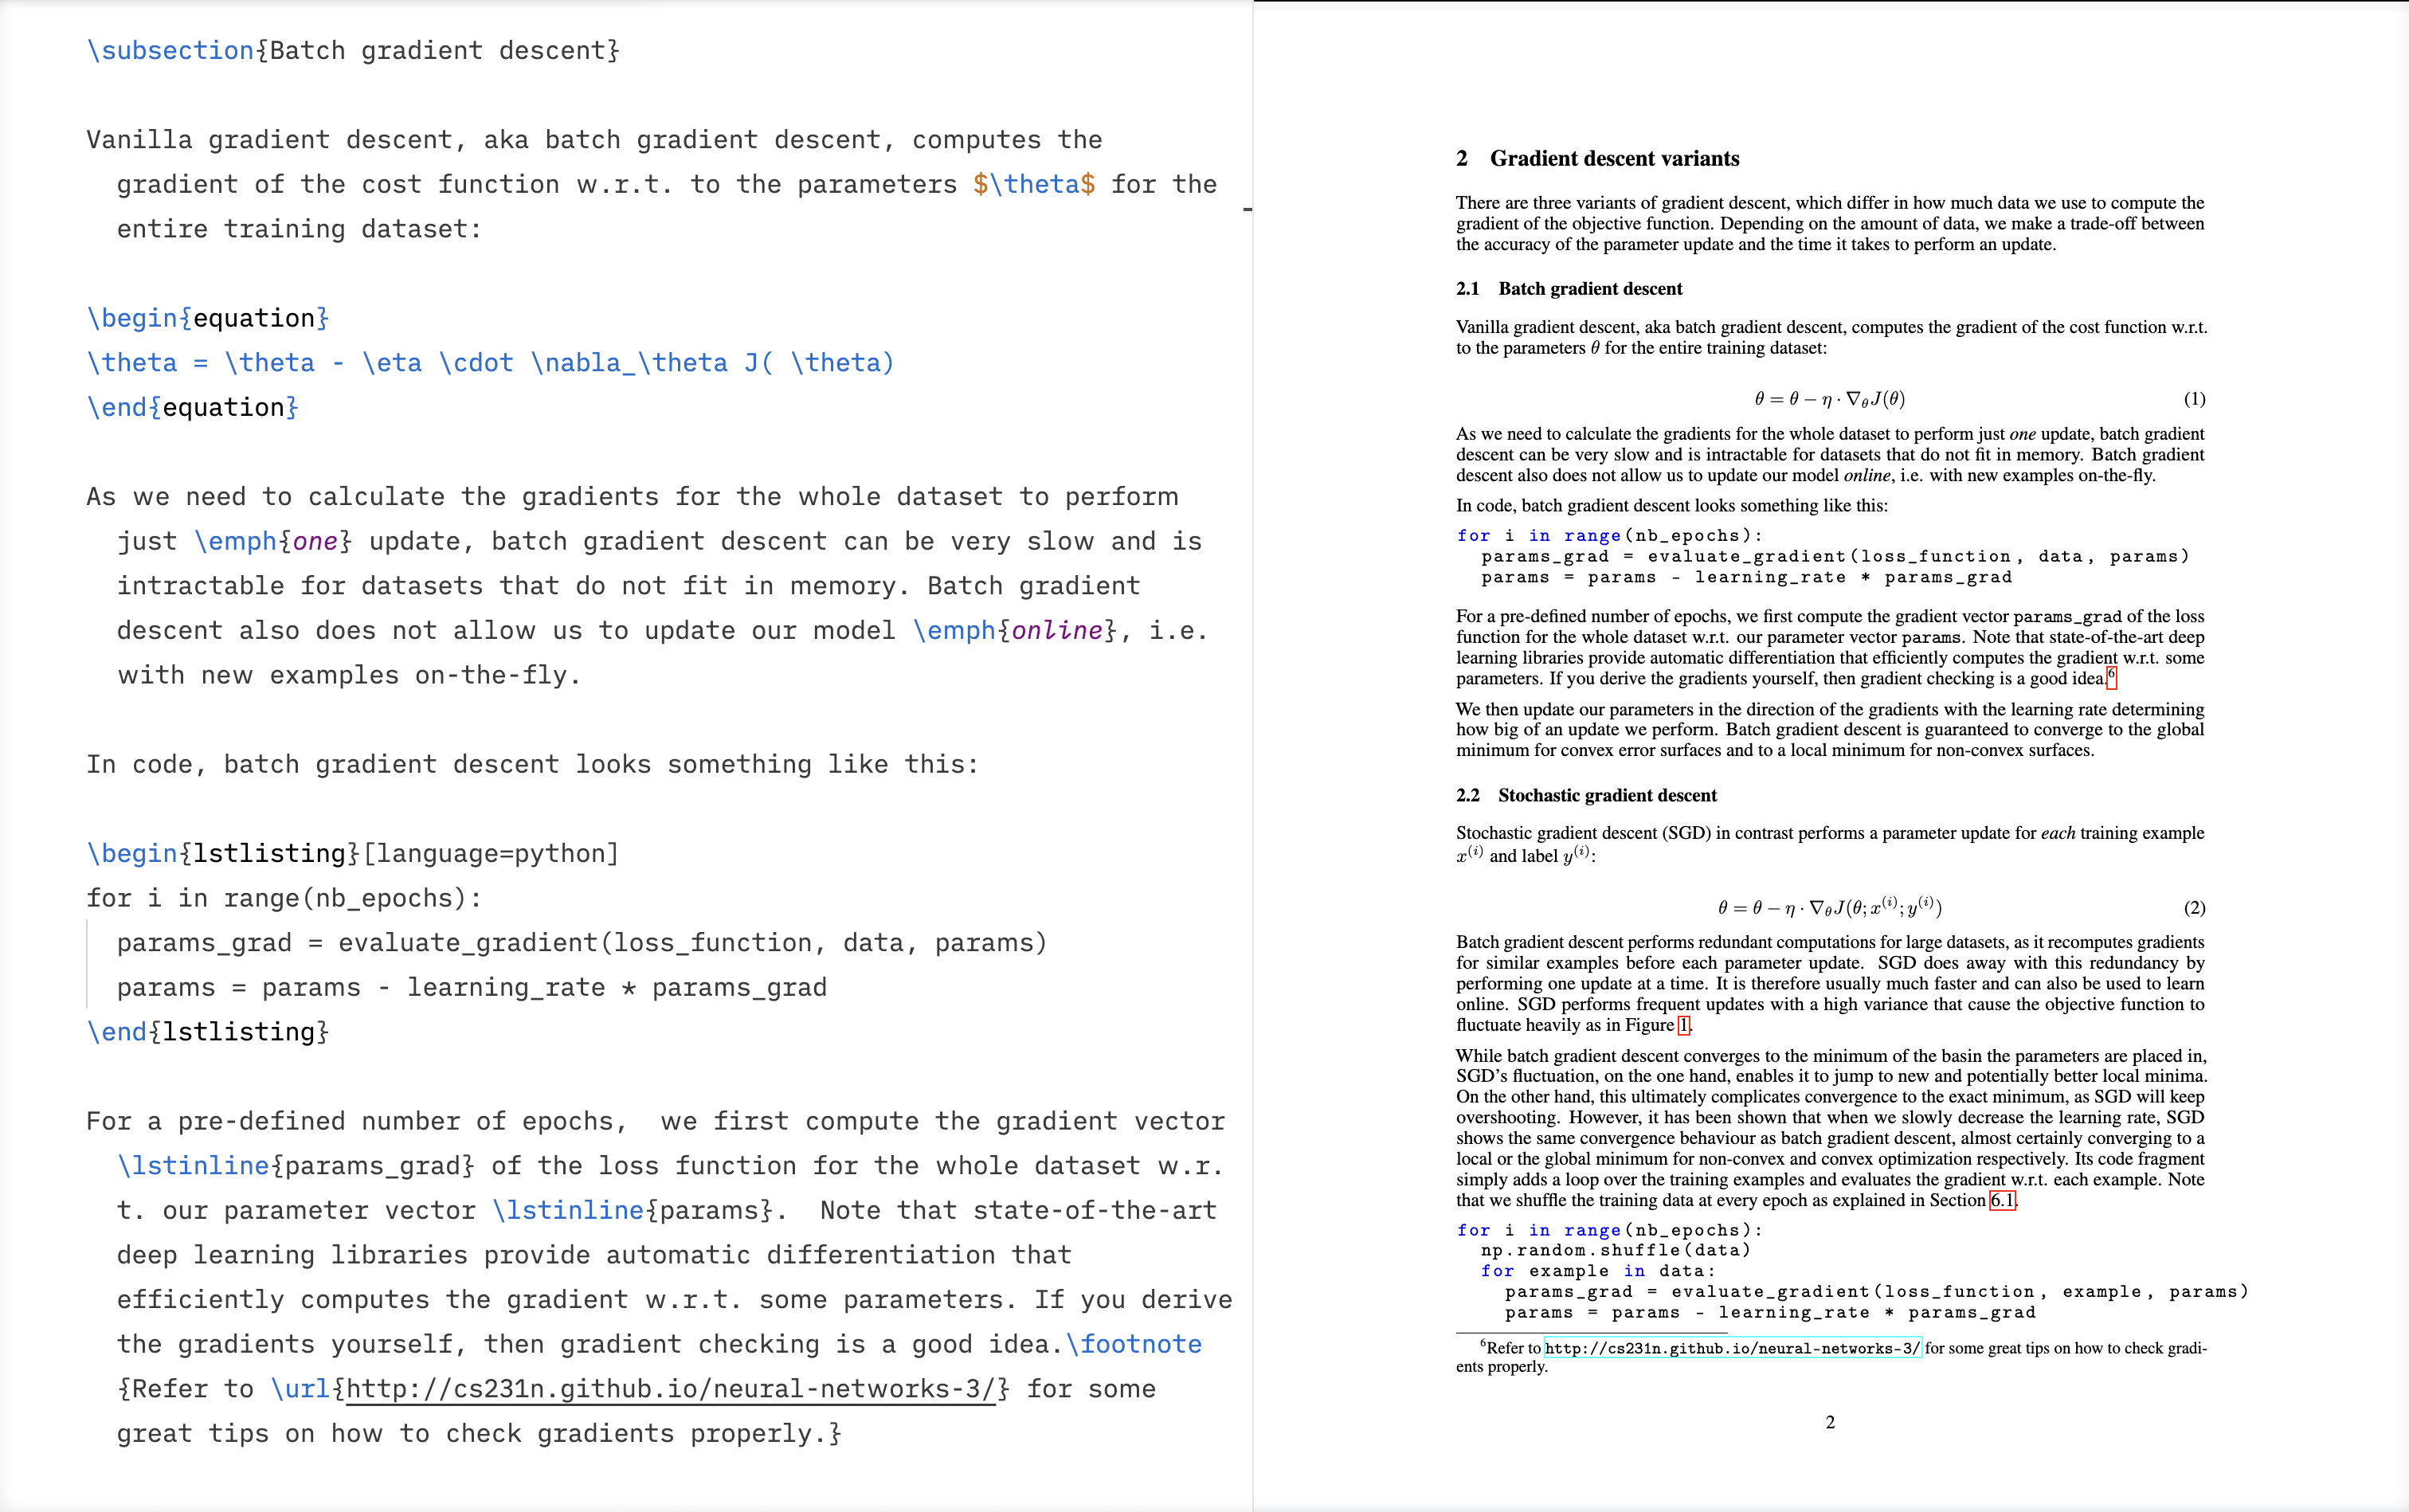
Zen mode: If you just want the main editor and PDF viewer without any toolbars, Zen Mode is useful. You can activate it by clicking View > Appearance > Zen Mode or by using the keyboard shortcut (cmd+k z).
Mac Users: If you have BetterTouchTool, you can create a Cmd + Click shortcut to go to the PDF location, similar to the functionality in TeXstudio and TeXShop.
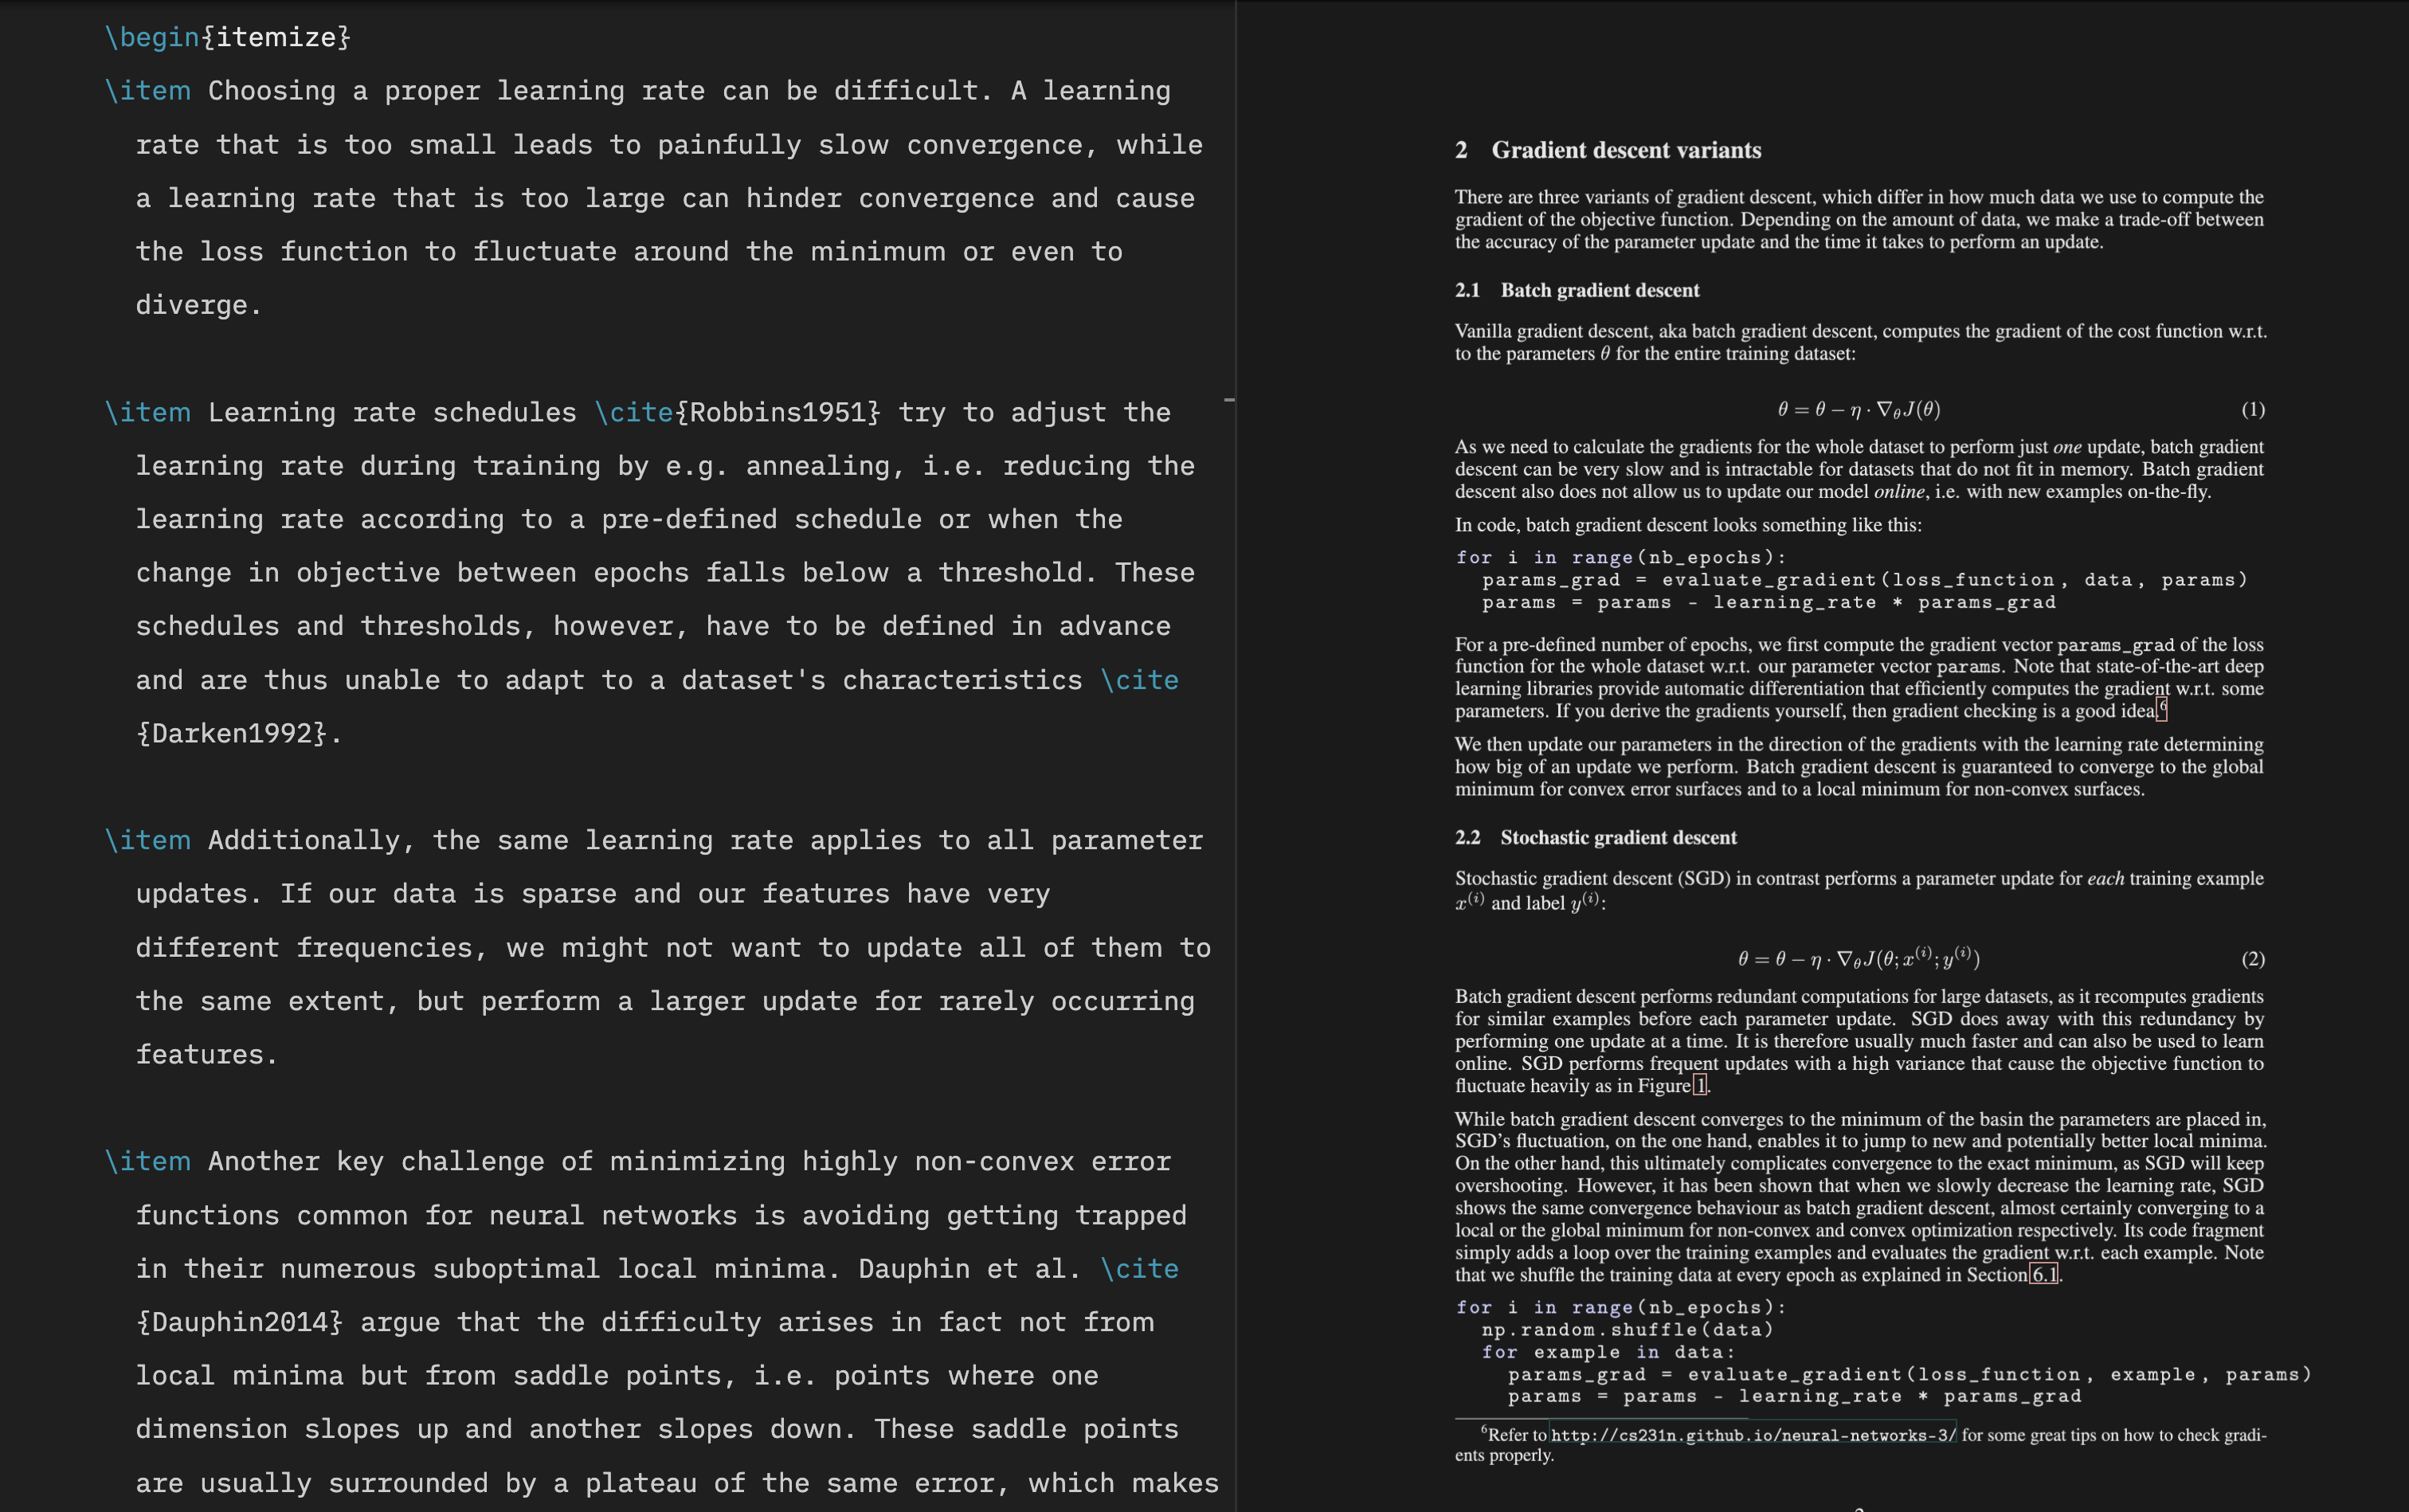
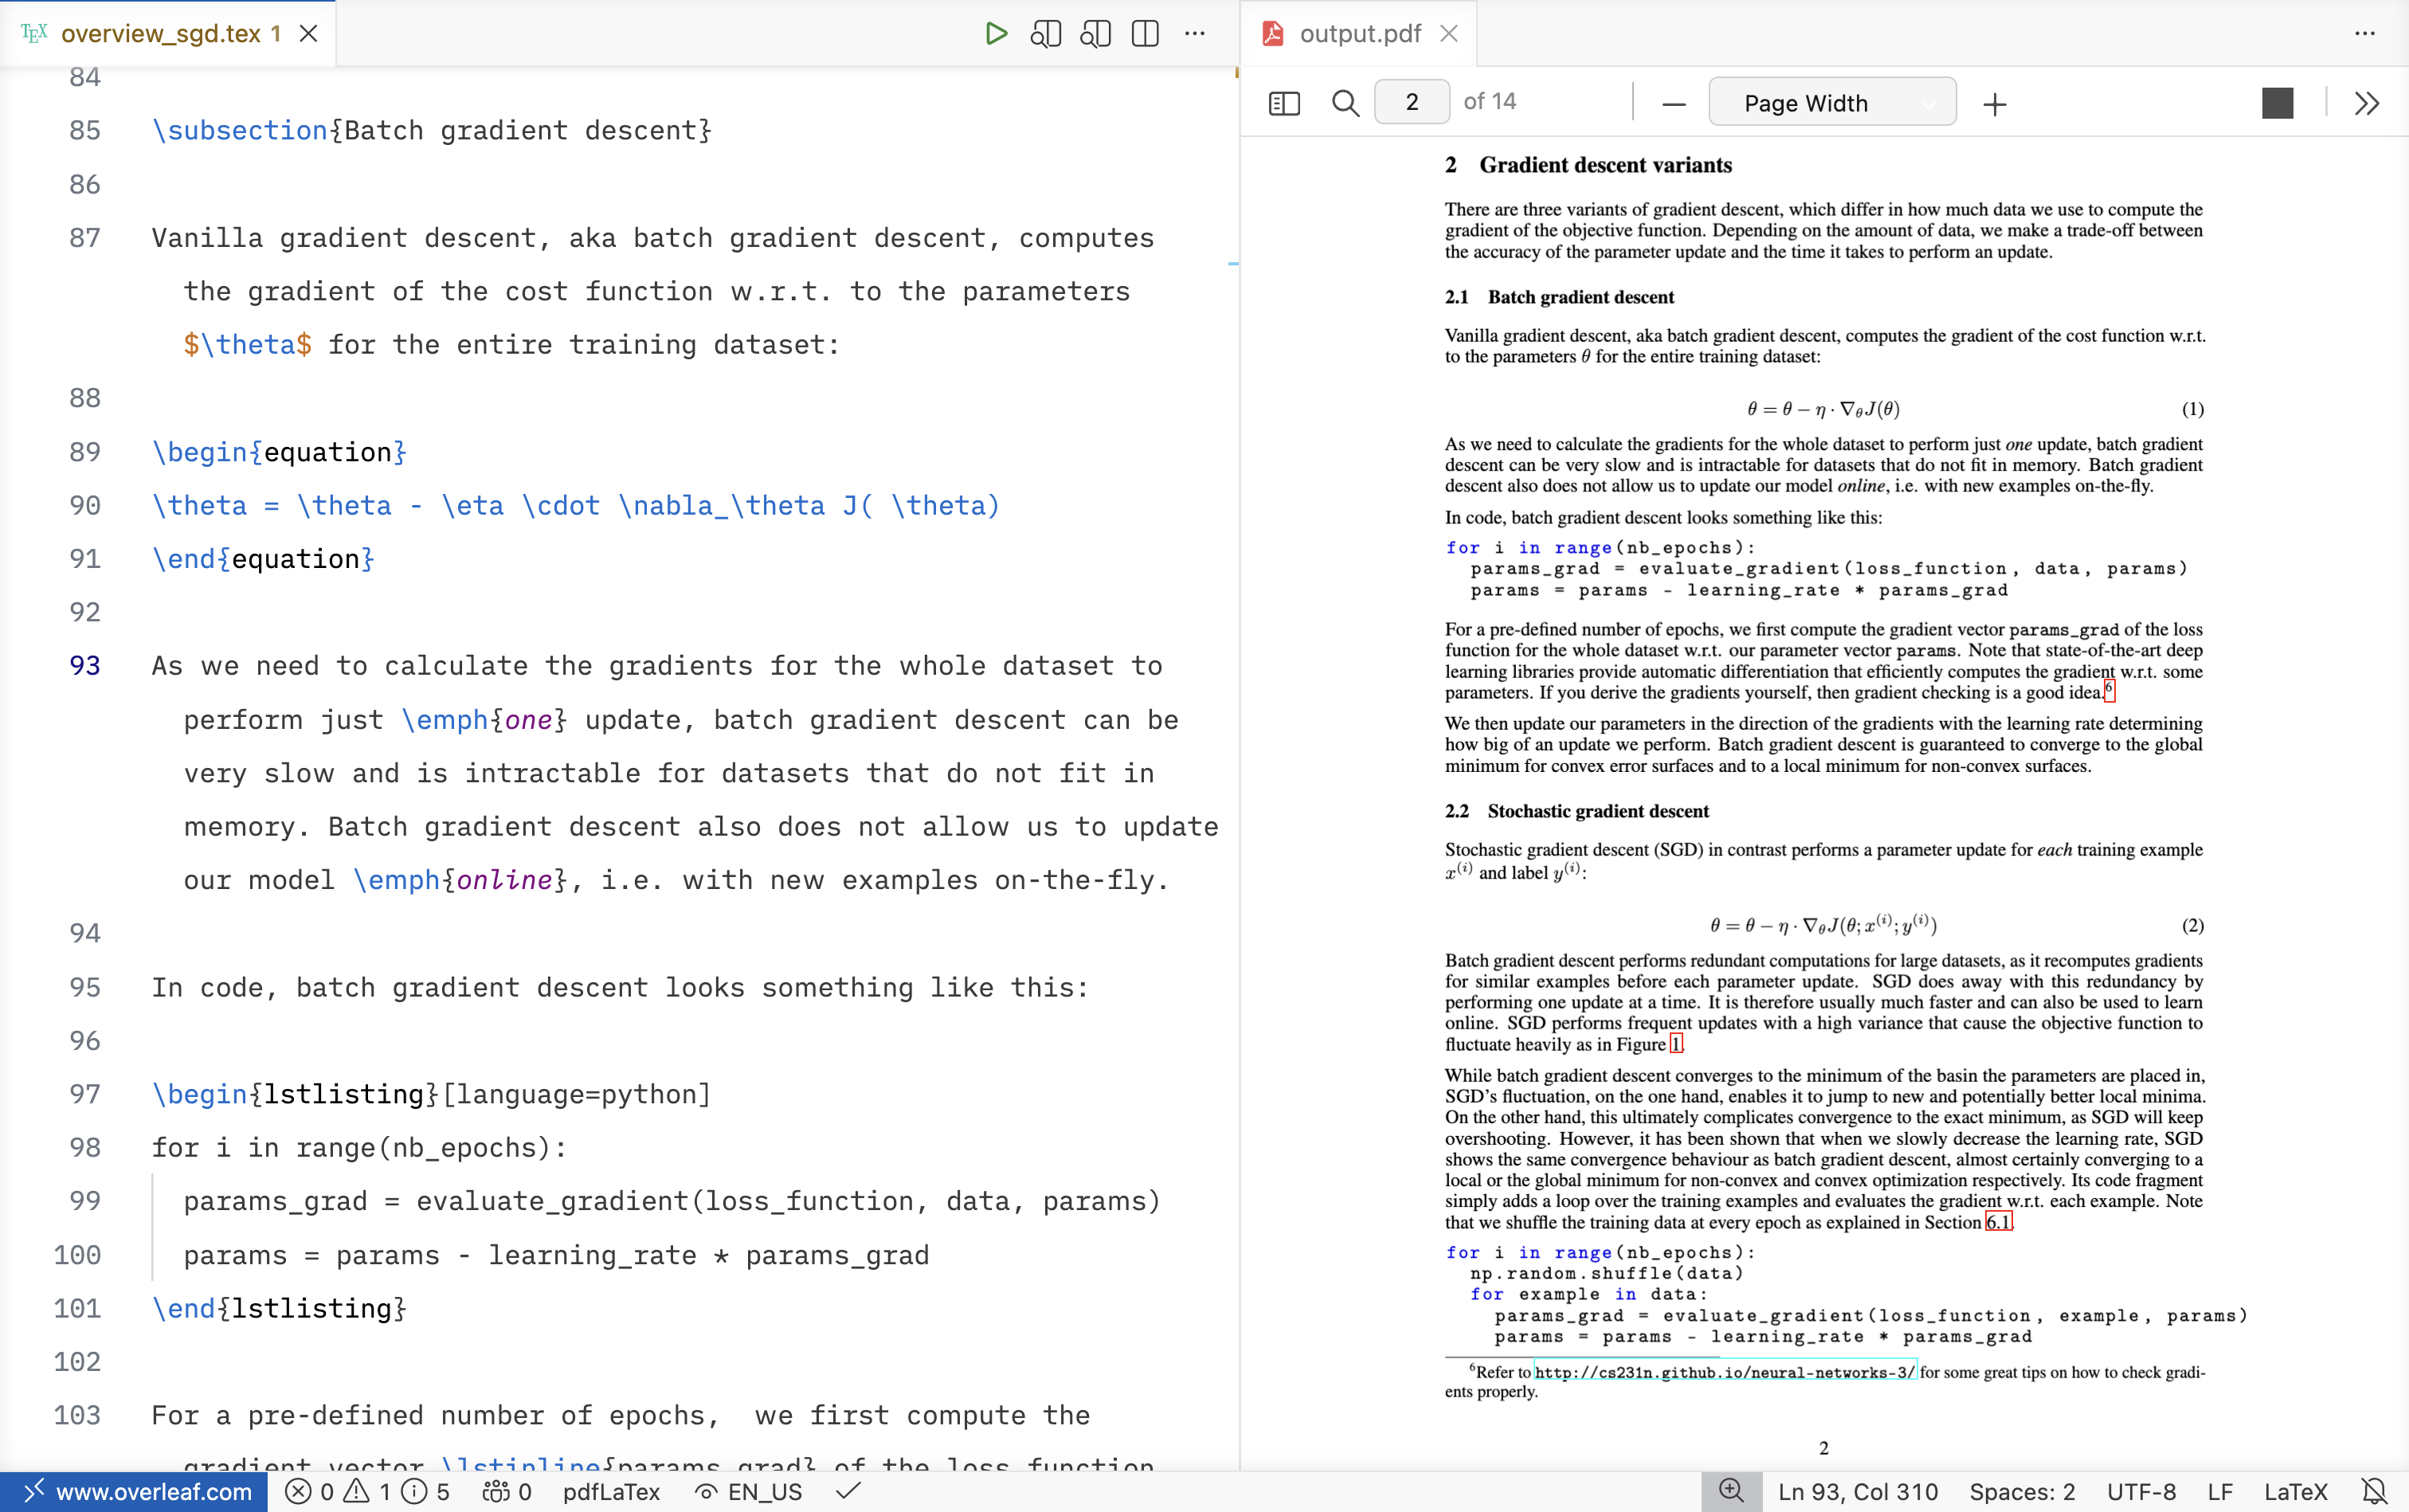
3 Overleaf via VSCodium
Some users have reported connection issues with the Overleaf Workshop extension in VSCode, but over the past two years, I have not experienced a single problem. The Overleaf Workshop extension can be installed from the Extensions Marketplace. Follow the official instructions to connect to the Overleaf server. I have updated the built-in PDF viewer toolbar with a few styling changes to give it a more modern look. Replace the contents of the index.js file located at ~/.vscode-oss/extensions/iamhyc.overleaf-workshop-0.15.8/views/pdf-viewer/ with index_mod.js file. Change the version number if yours is different. On Windows, it is located at %USERPROFILE%.vscode-oss\extensions\iamhyc.overleaf-workshop-0.15.8-universal\views\pdf-viewer.
4 Overleaf (Web)
You can apply the same coloring scheme to the Overleaf web editor using a custom CSS file. Install the Stylus extension (or an equivalent alternative) and copy the CSS content from Overleaf_web.css file. The iA Writer font can also be loaded directly via CSS so the web editor matches your local setup.

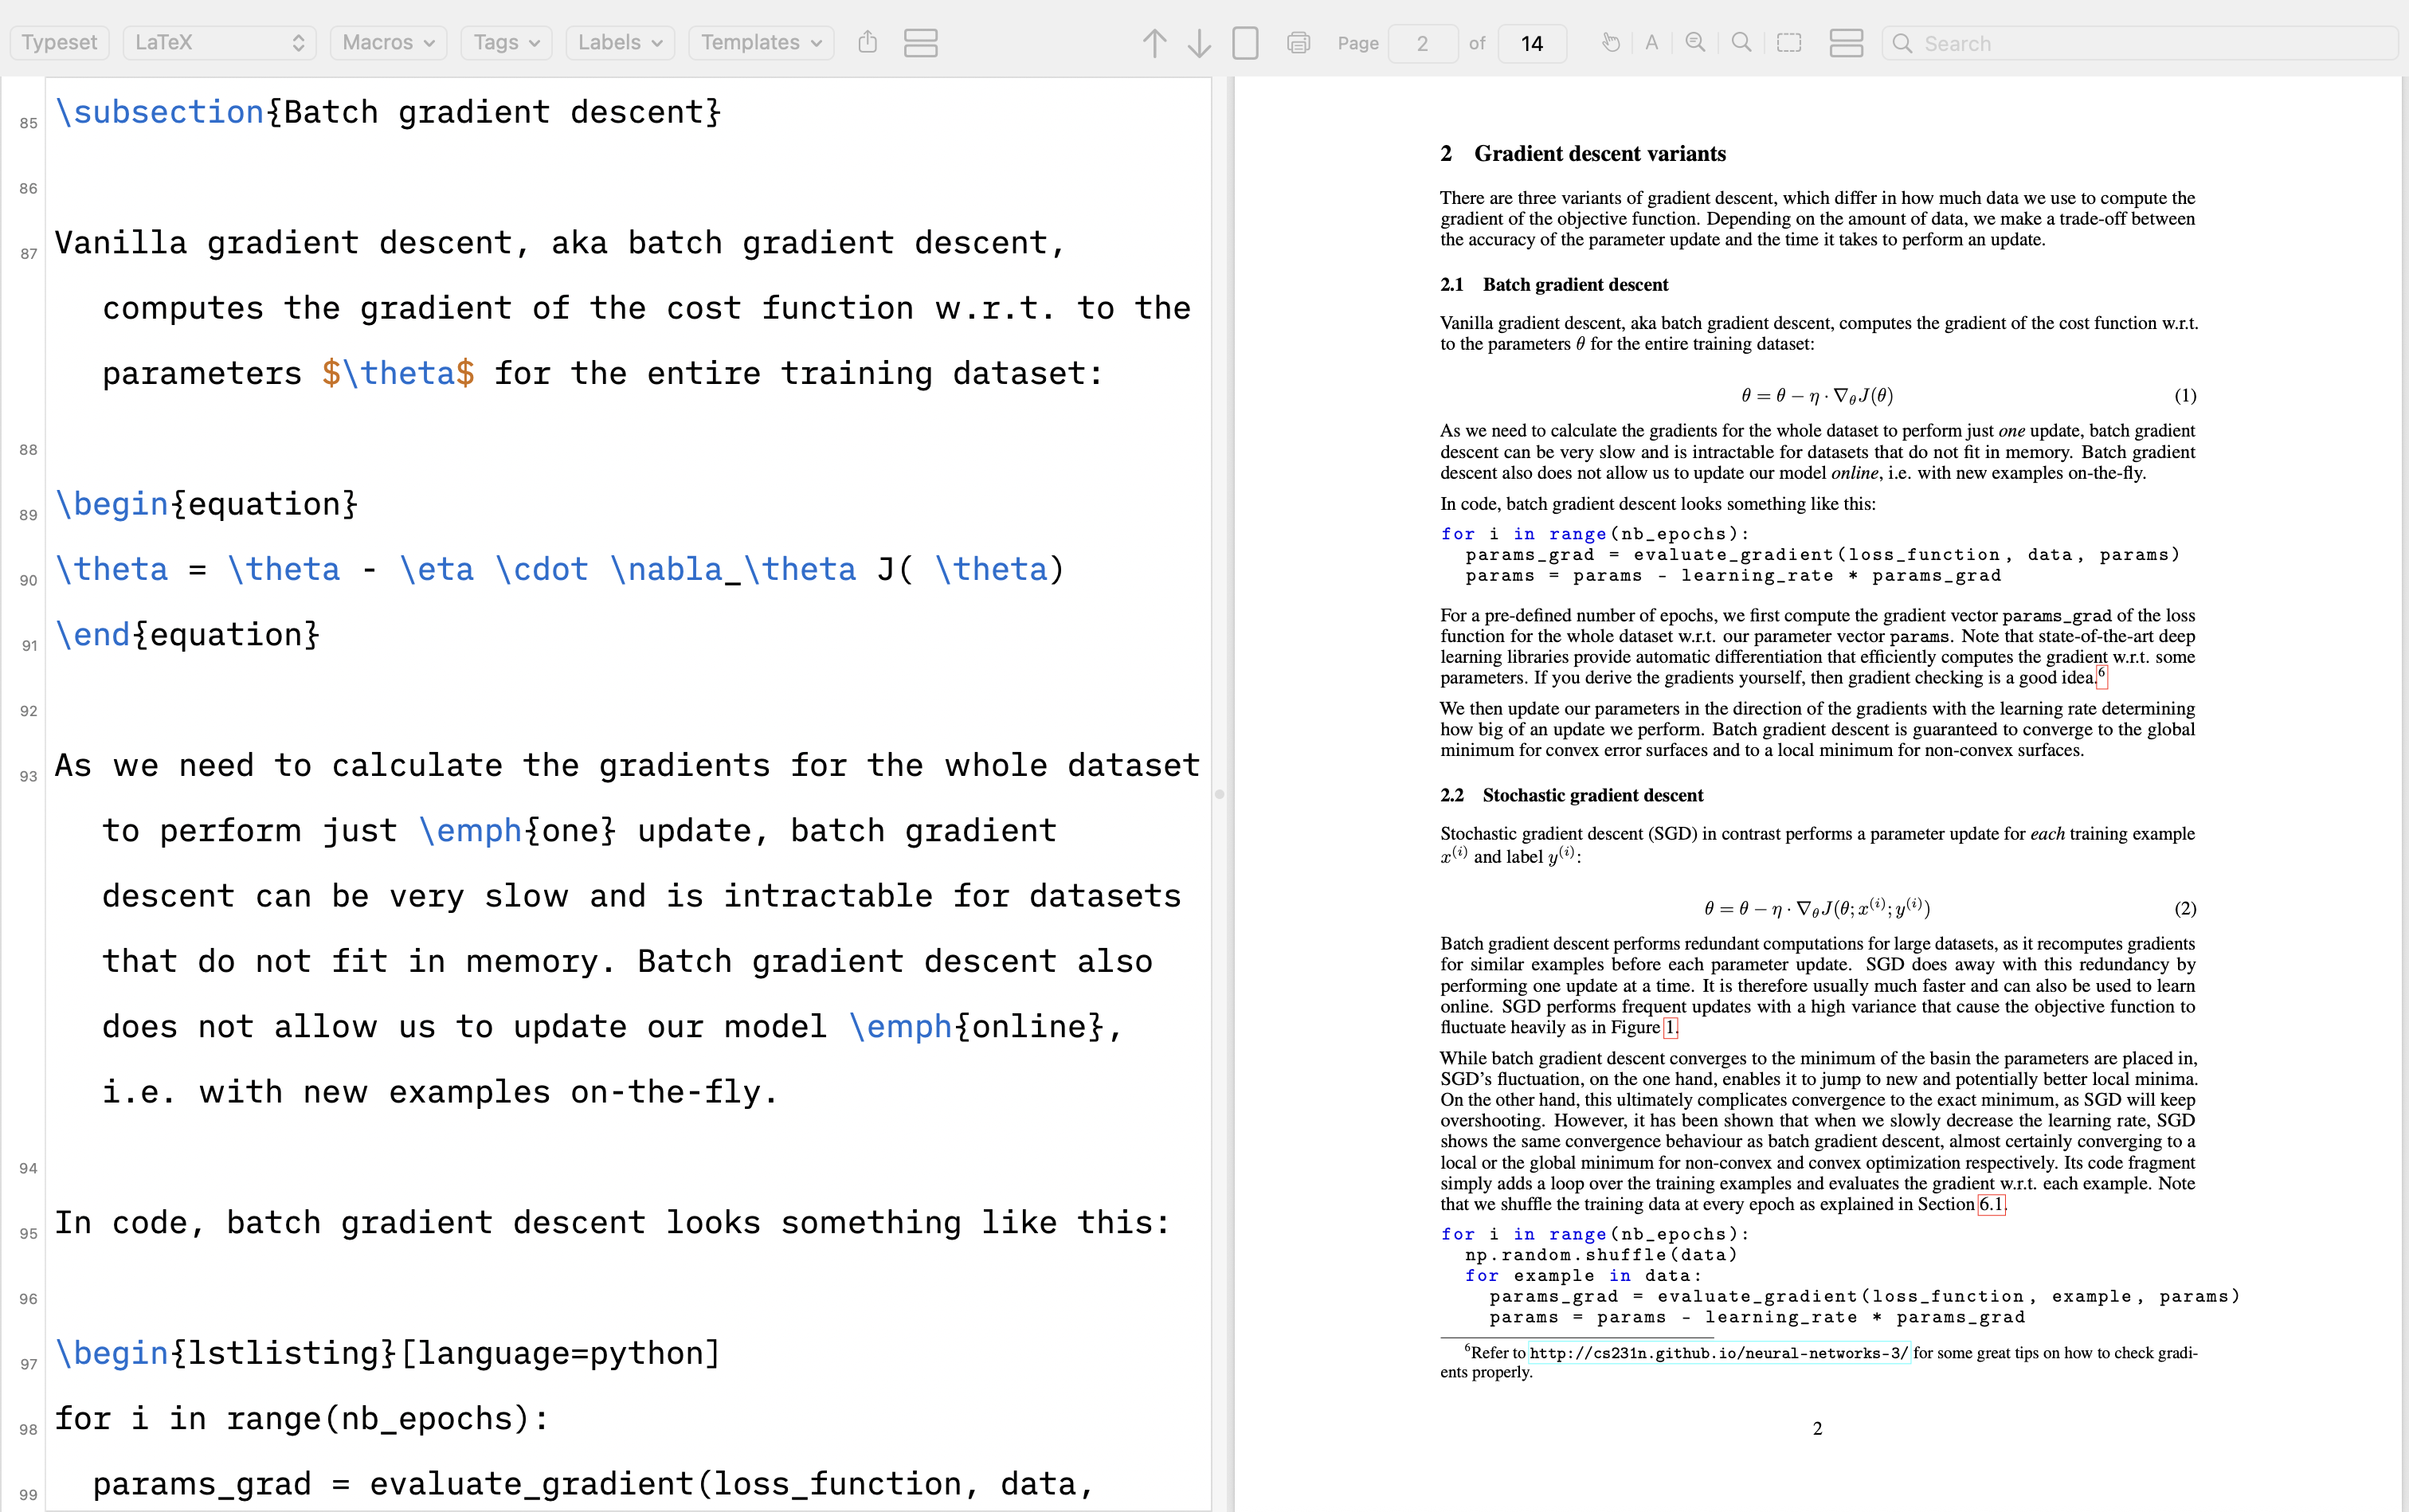
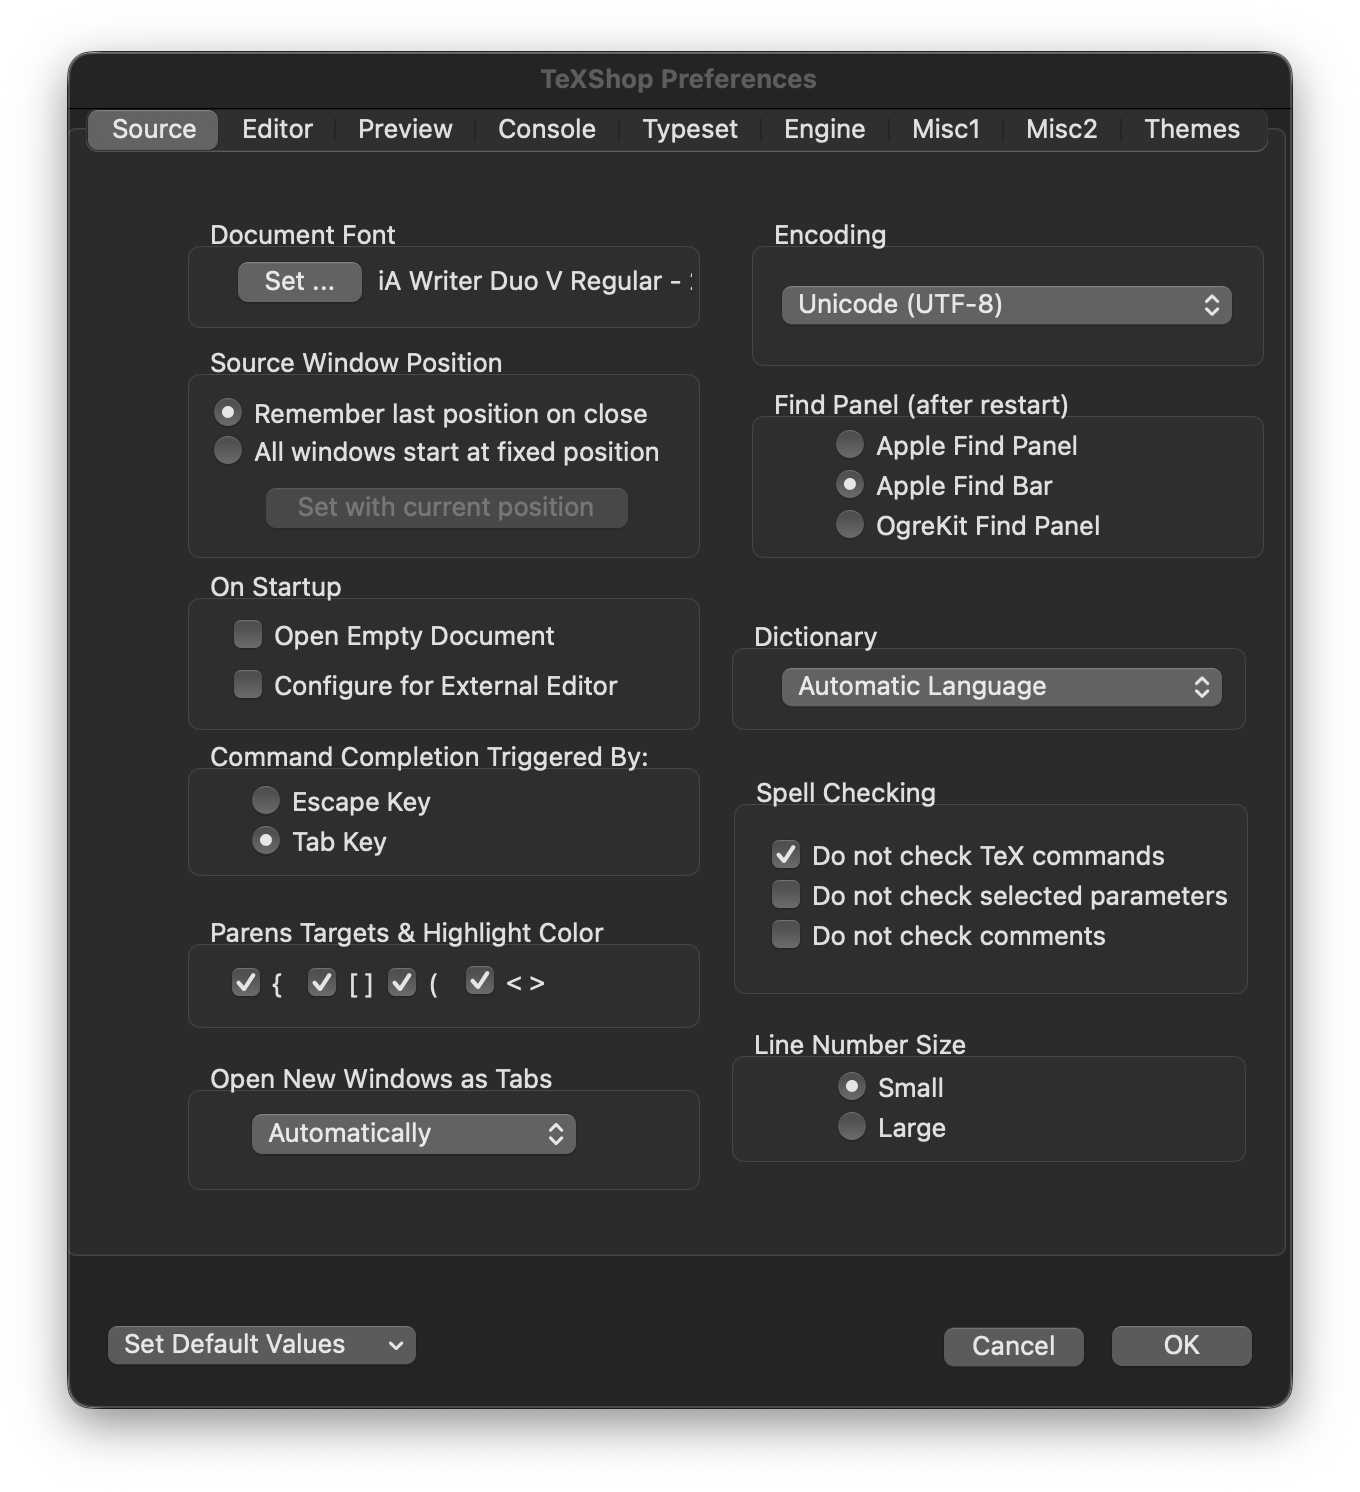
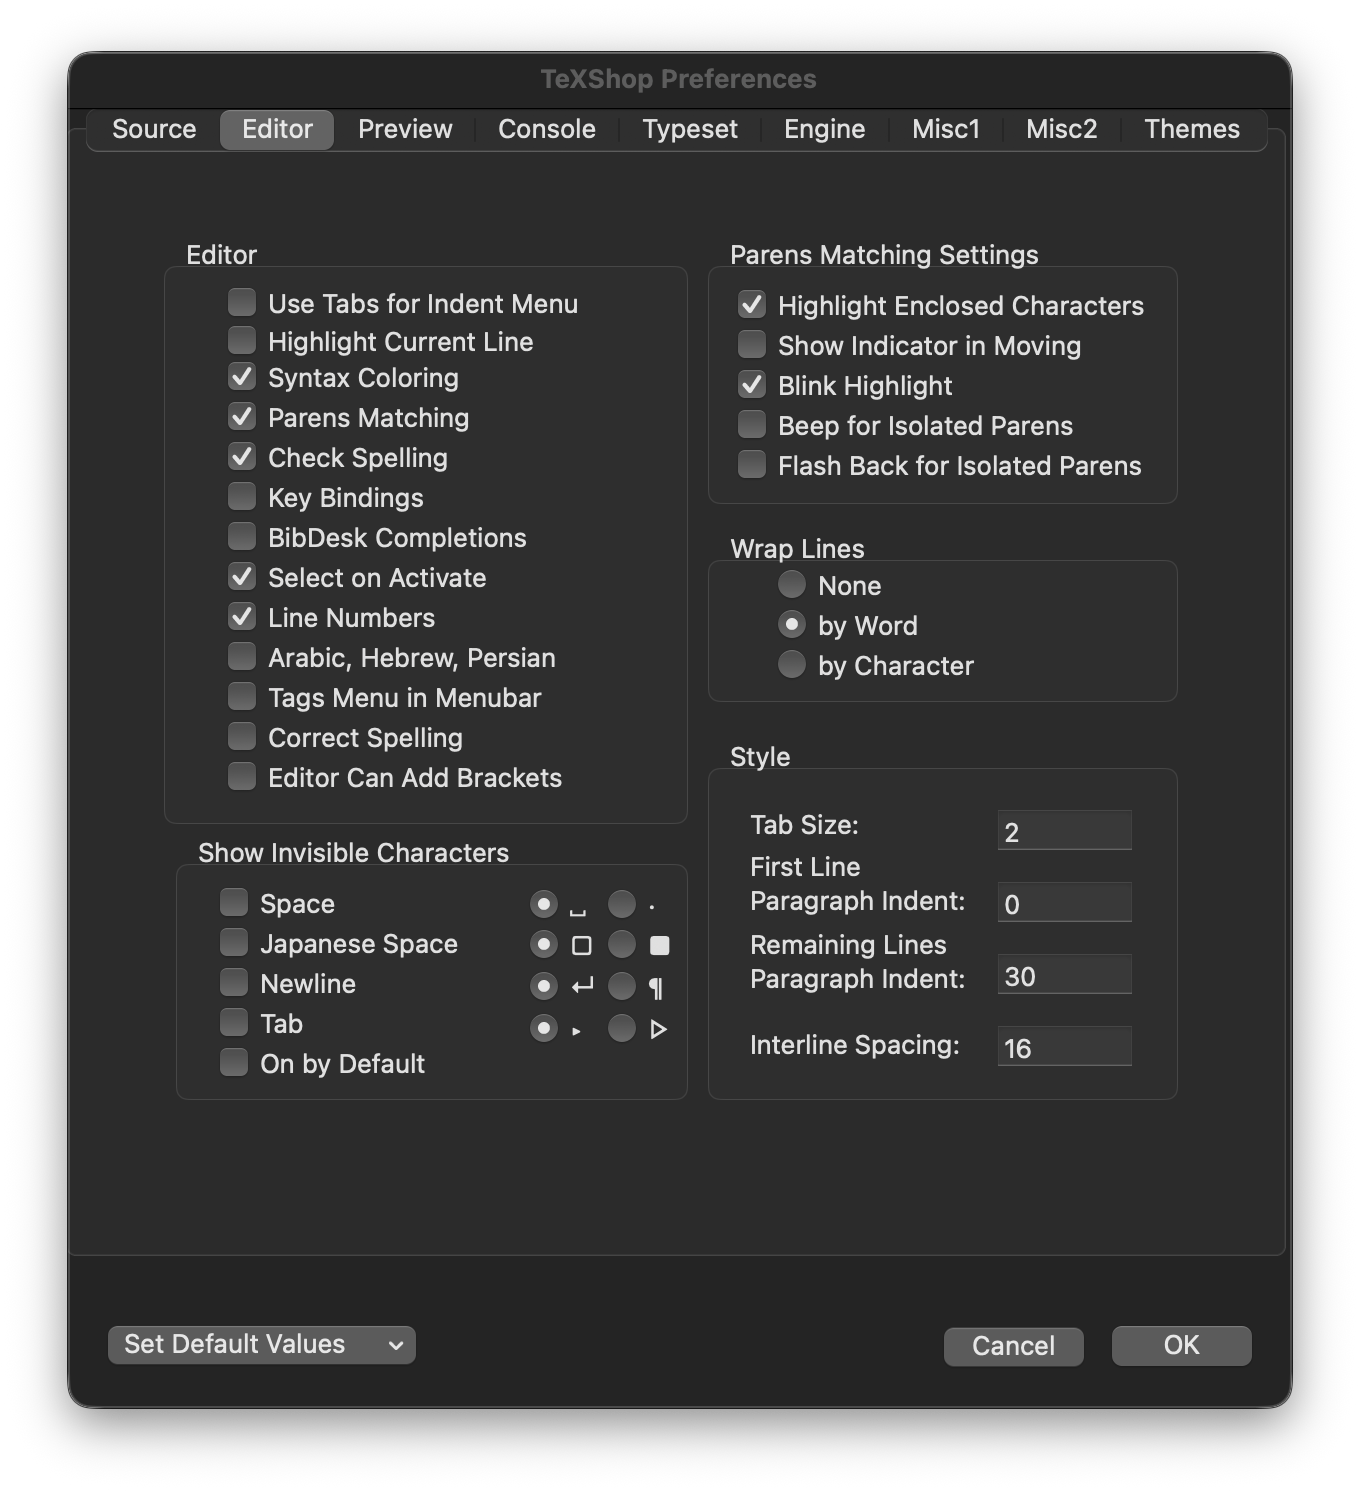
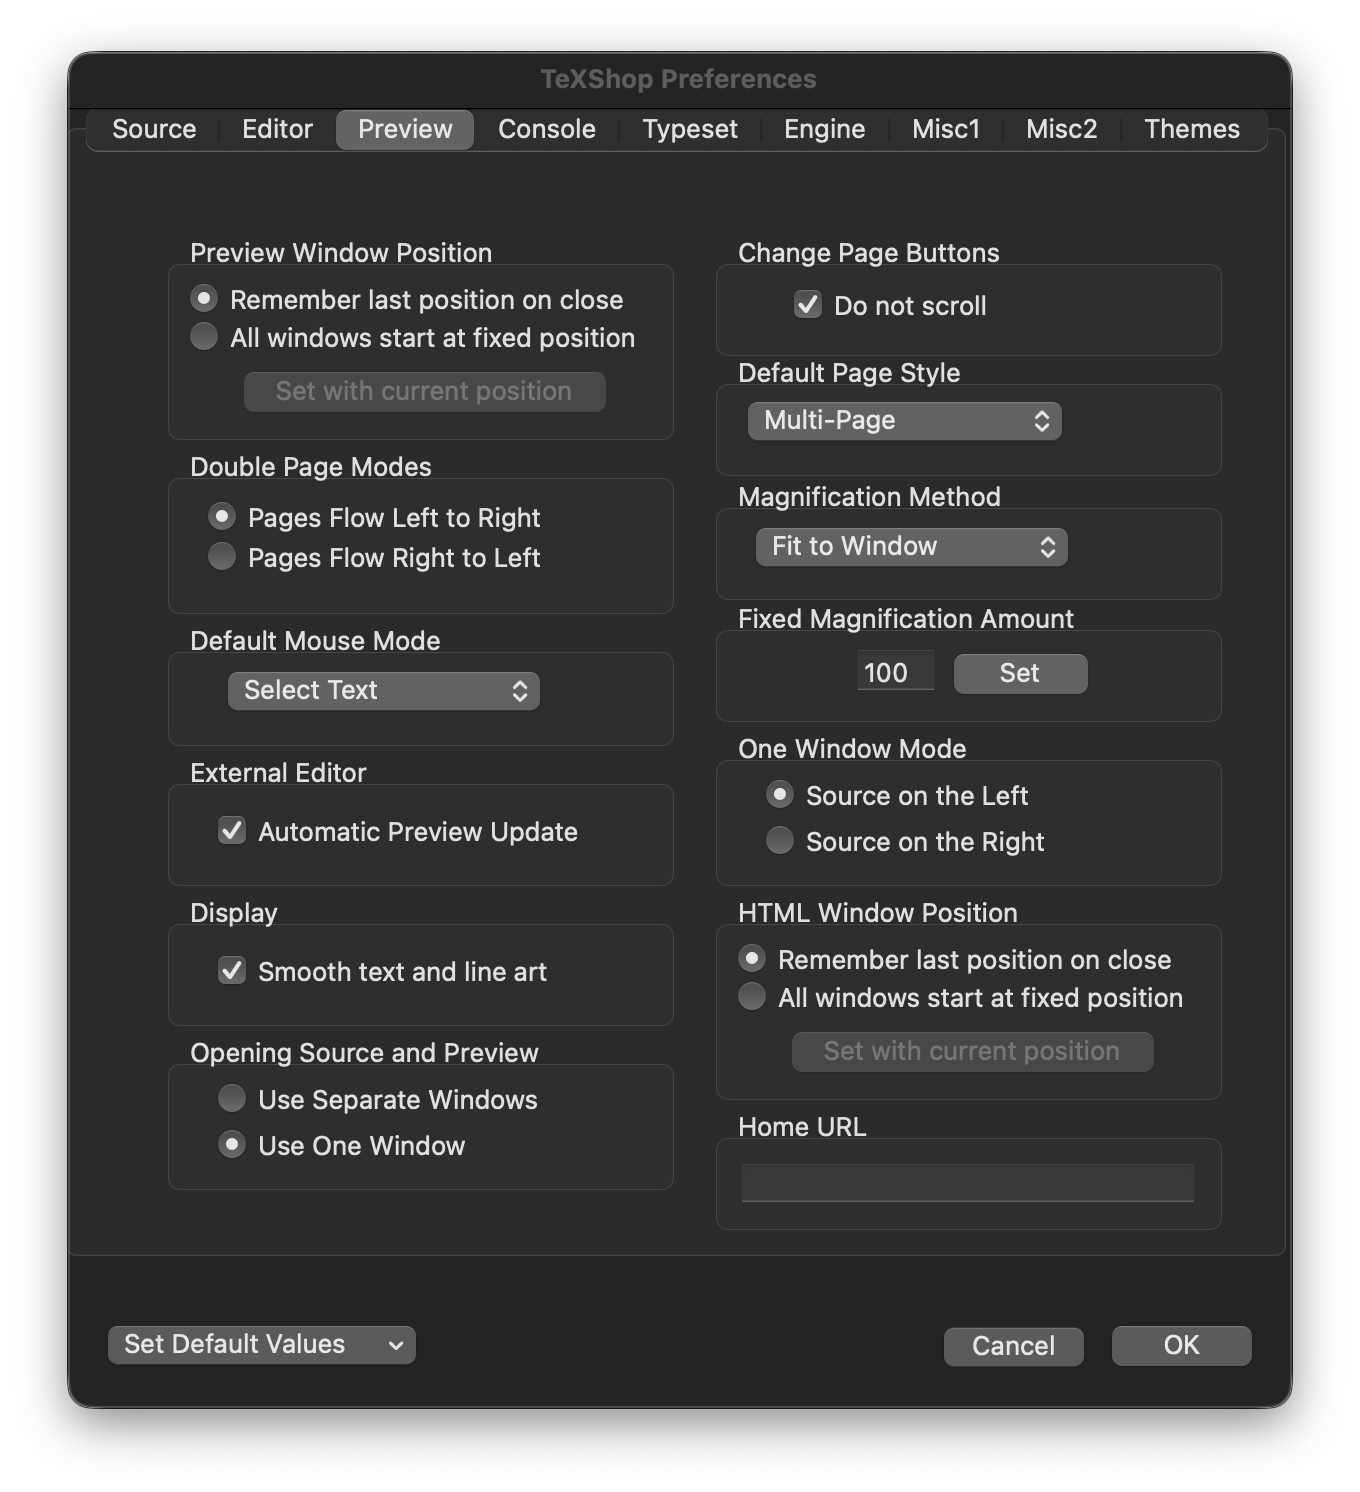
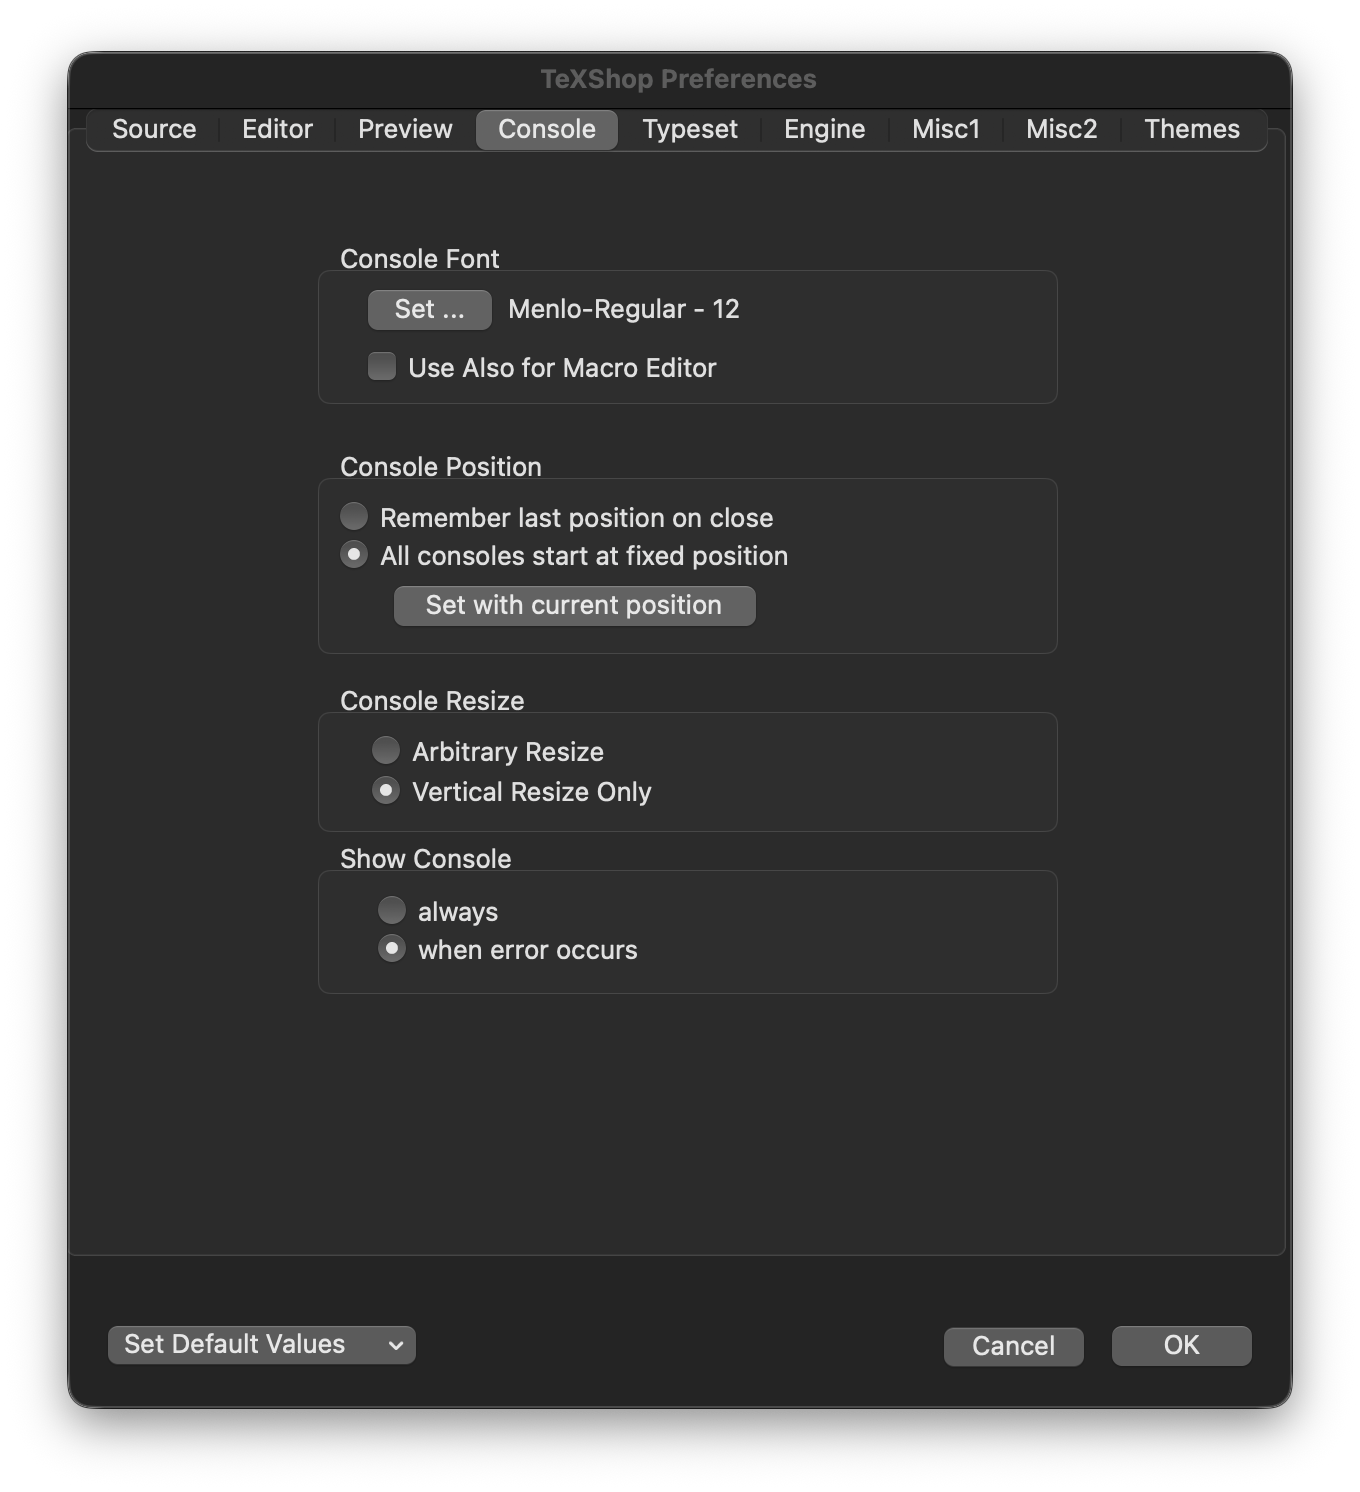
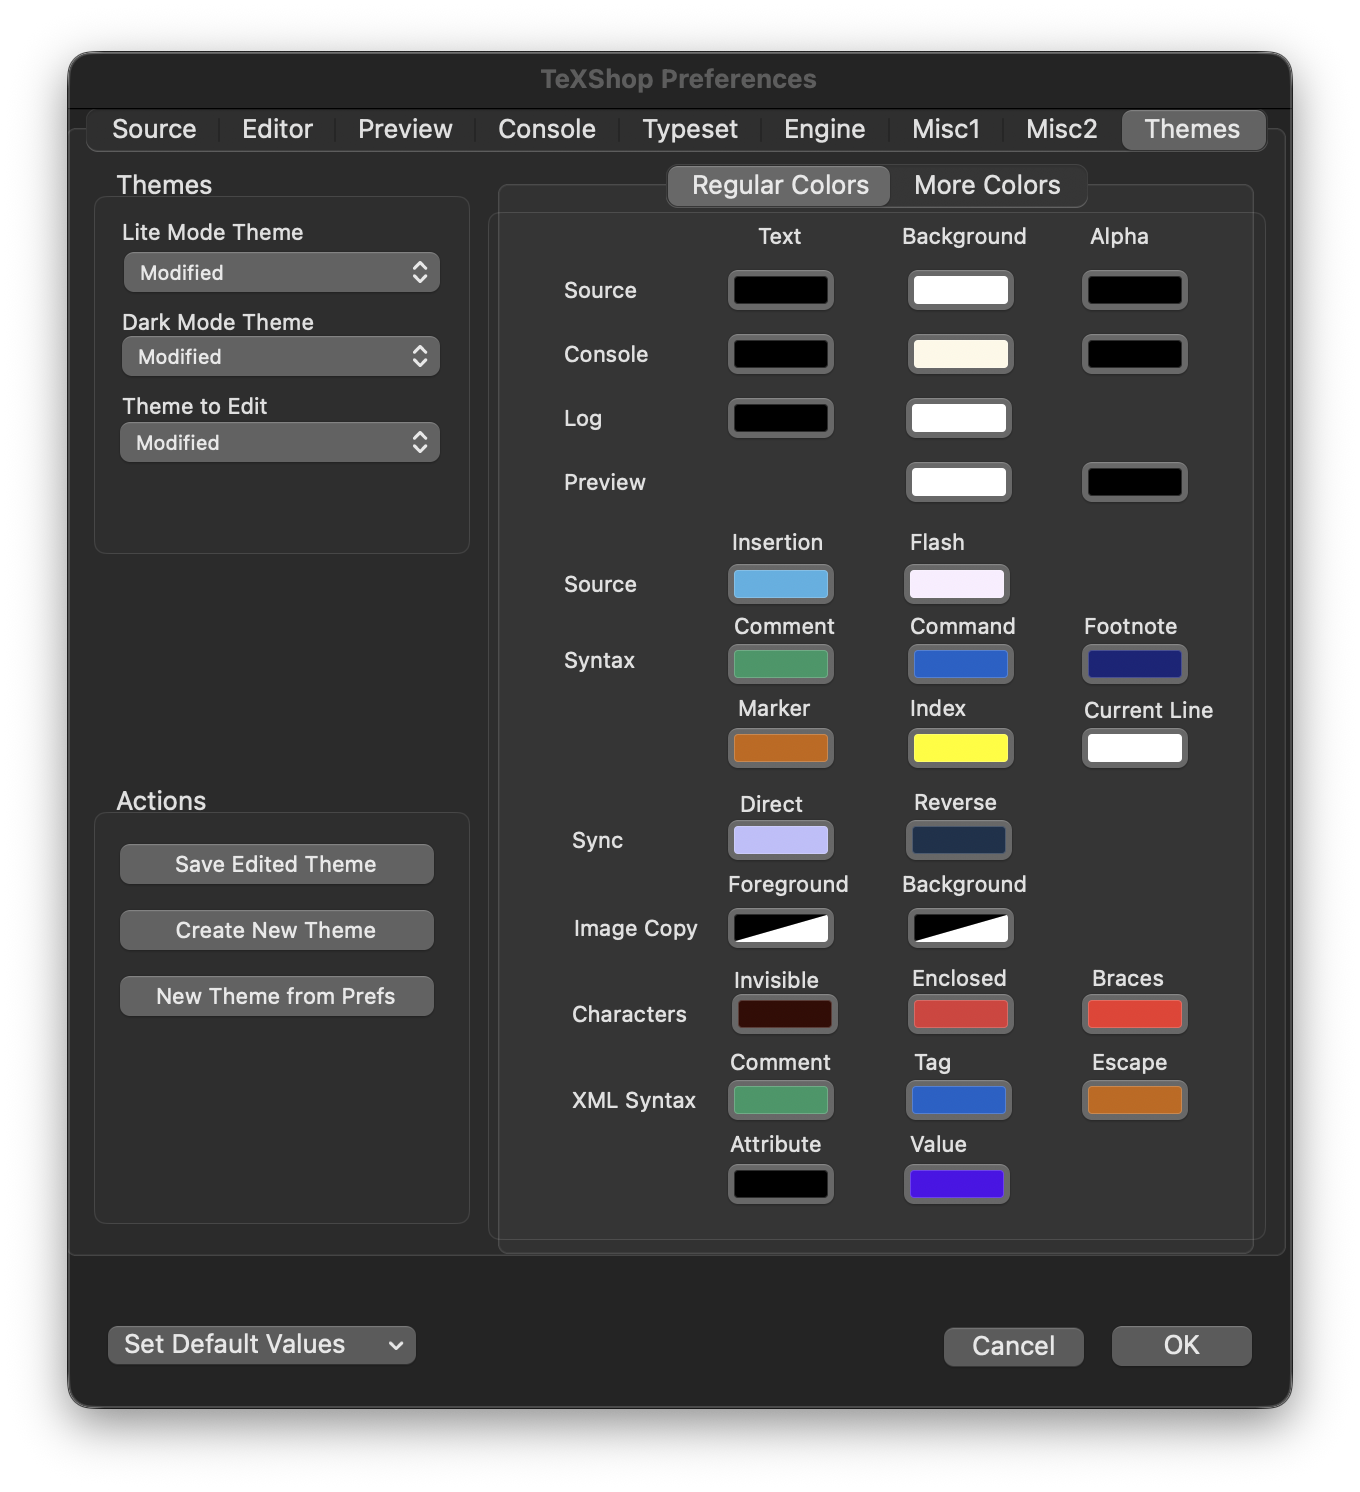
5 TeXShop
I do not use TeXShop heavily, but I created a matching theme Modified.plist. To use this theme, copy the file to ~/Library/TeXShop/Themes and modify the other preferences as shown below: